
Saving printed layouts
Preparing to save layouts for printing
Before saving a layout, we edit legal information and price tags, set presets and indicate the layout format.
-
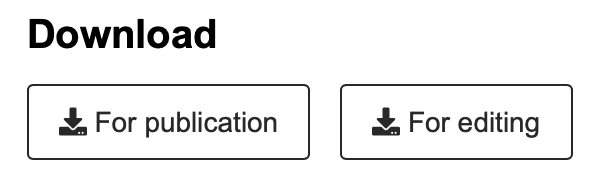
Download a layout for editing
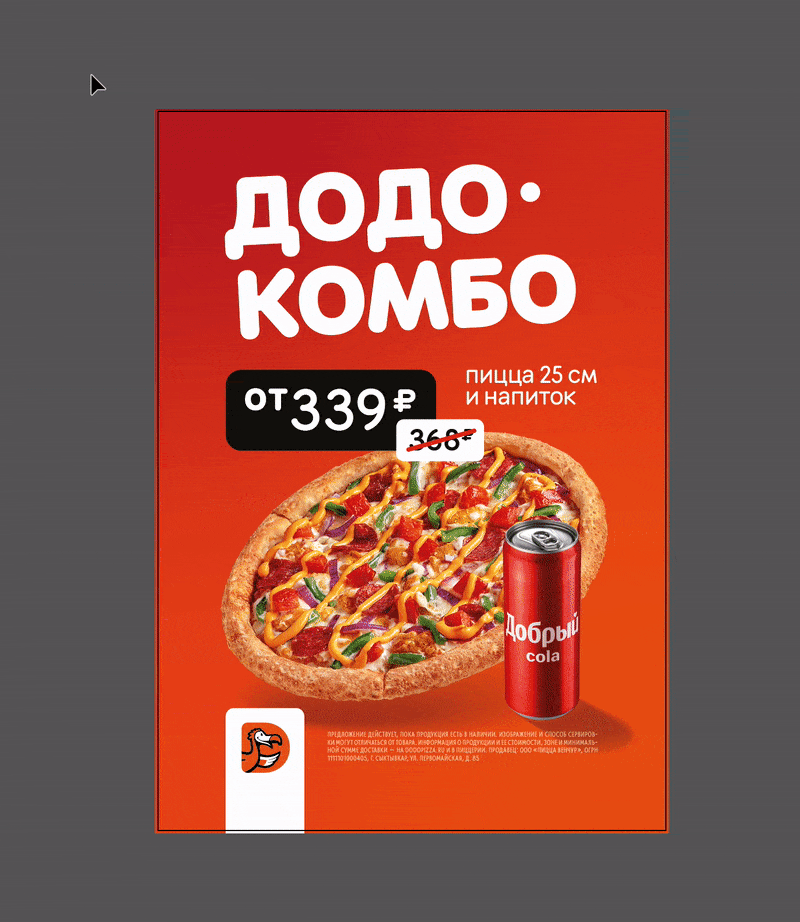
You will find it under the “For Editing” button in the Knowledge base. It brings you to the folder with the layout in .ai format.
-
Open the layout in Adobe Illustrator
If Adobe software indicates errors related to fonts, download the fonts again and reinstall them. This can happen if we have updated the font before, but the program still contains the previous version. You can download fonts from the Brand book.
-
Editing the layout
If you need to edit legal information, select a price group or navigation in the layout, follow the instructions from the guides below:
- Edit legal information in the layout,
- Select a price group in the layout,
- Edit navigation in outdoor advertising layouts.
When you are done with all the changes, move on to the next point.
-
Install the preset with PDF settings
Download it from the PDF Profile folder. The preset will make it easier to save small and medium-sized print formats. To install it, open the file with the preset in Adobe Illustrator using the right mouse button "Open with". You won’t notice any visible changes, but the preset will be installed after the click.
If the preset cannot be installed, set it up manually.
-
Figure out the layout format
Depending on the media you choose, the algorithm of saving the layout varies. There are four formats in total:
- Small print media, which are all formats from A7 to A2: leaflets, table tents, checkout posters, adverts.
- Medium print media: A1 and A0 light boxes.
- Outdoor advertising: city formats and pillars.
- Billboards. Technically, they are also outdoor advertising, but they should be saved with a different resolution.
Saving the layout for small print media
The instructions are suitable for all media from A7 to A2, which are mostly leaflets, table tents, checkout posters and adverts.
-
Select all objects on the layout
Use the cursor or the keyboard shortcut Cmnd+A.
-
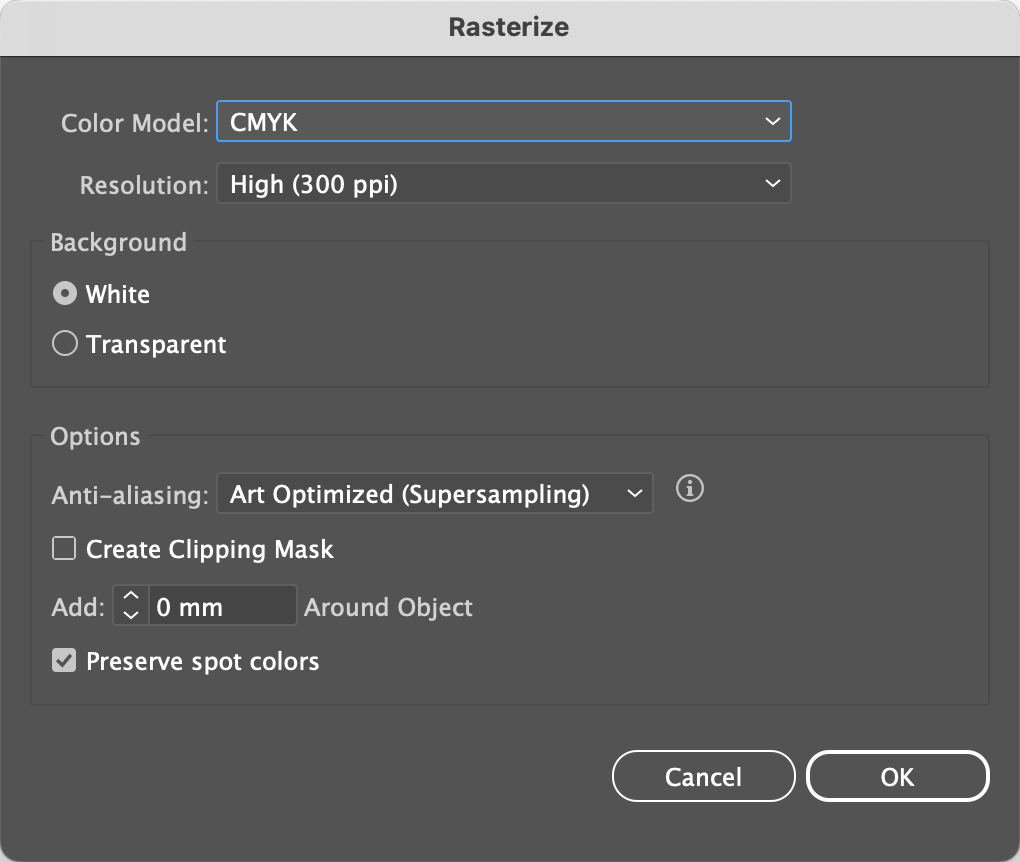
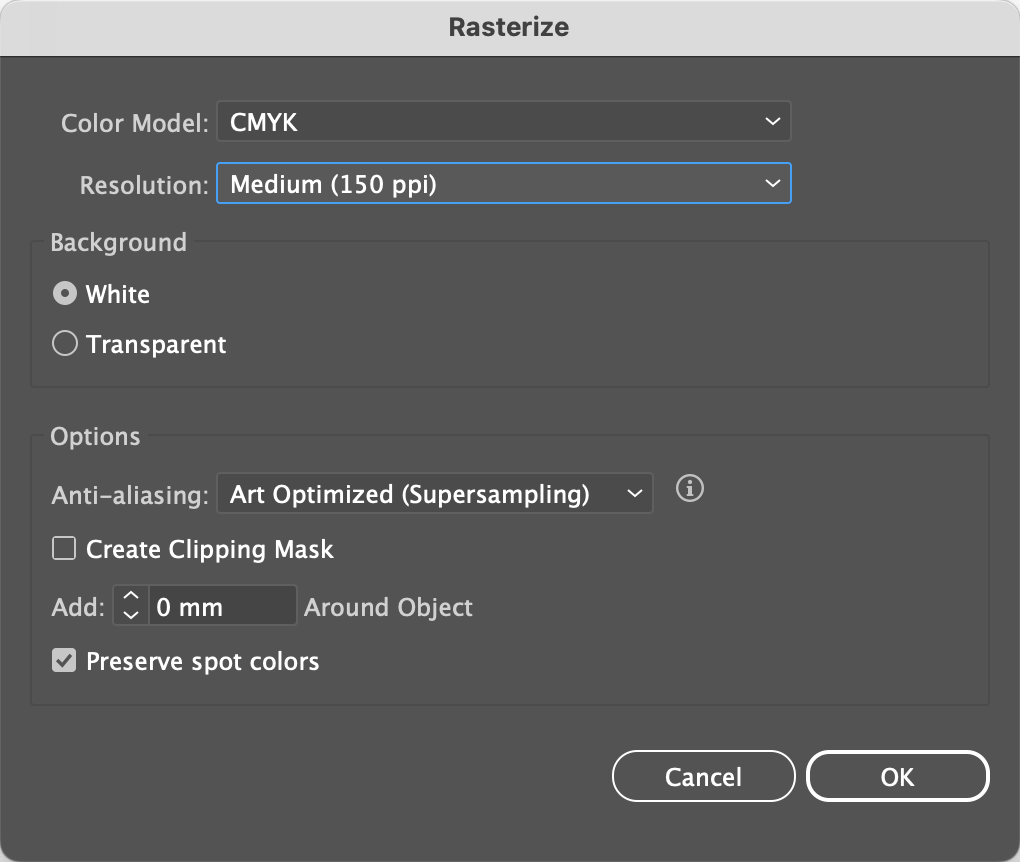
Rasterise the selected objects with 300 ppi resolution
To merge the layout into one image (this is called rasterisation), open the menu at the top of the Adobe Illustrator window. Click “Object” and then select “Rasterize” in the drop-down menu. After that a dialogue window with rasterisation settings will appear. Choose the settings as shown on the screenshot. Now the layout is merged into one image, and we won't lose any elements when printing.
-
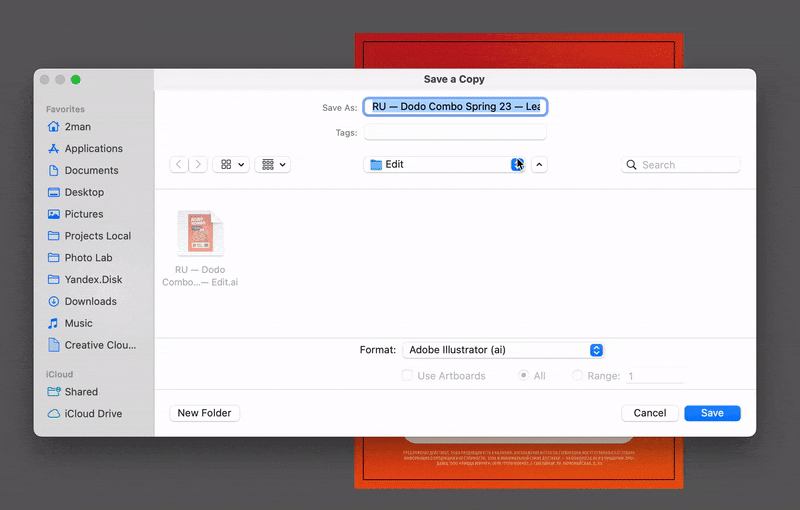
Save a copy of the layout in PDF format
Find the “File” item in Adobe Illustrator menu. Select “Save As” in the drop-down menu. Change the file name from “Edit” to “Print” to avoid confusion. Select “Adobe PDF” (pdf) in the “Format” drop-down menu and then click “Save”.

-
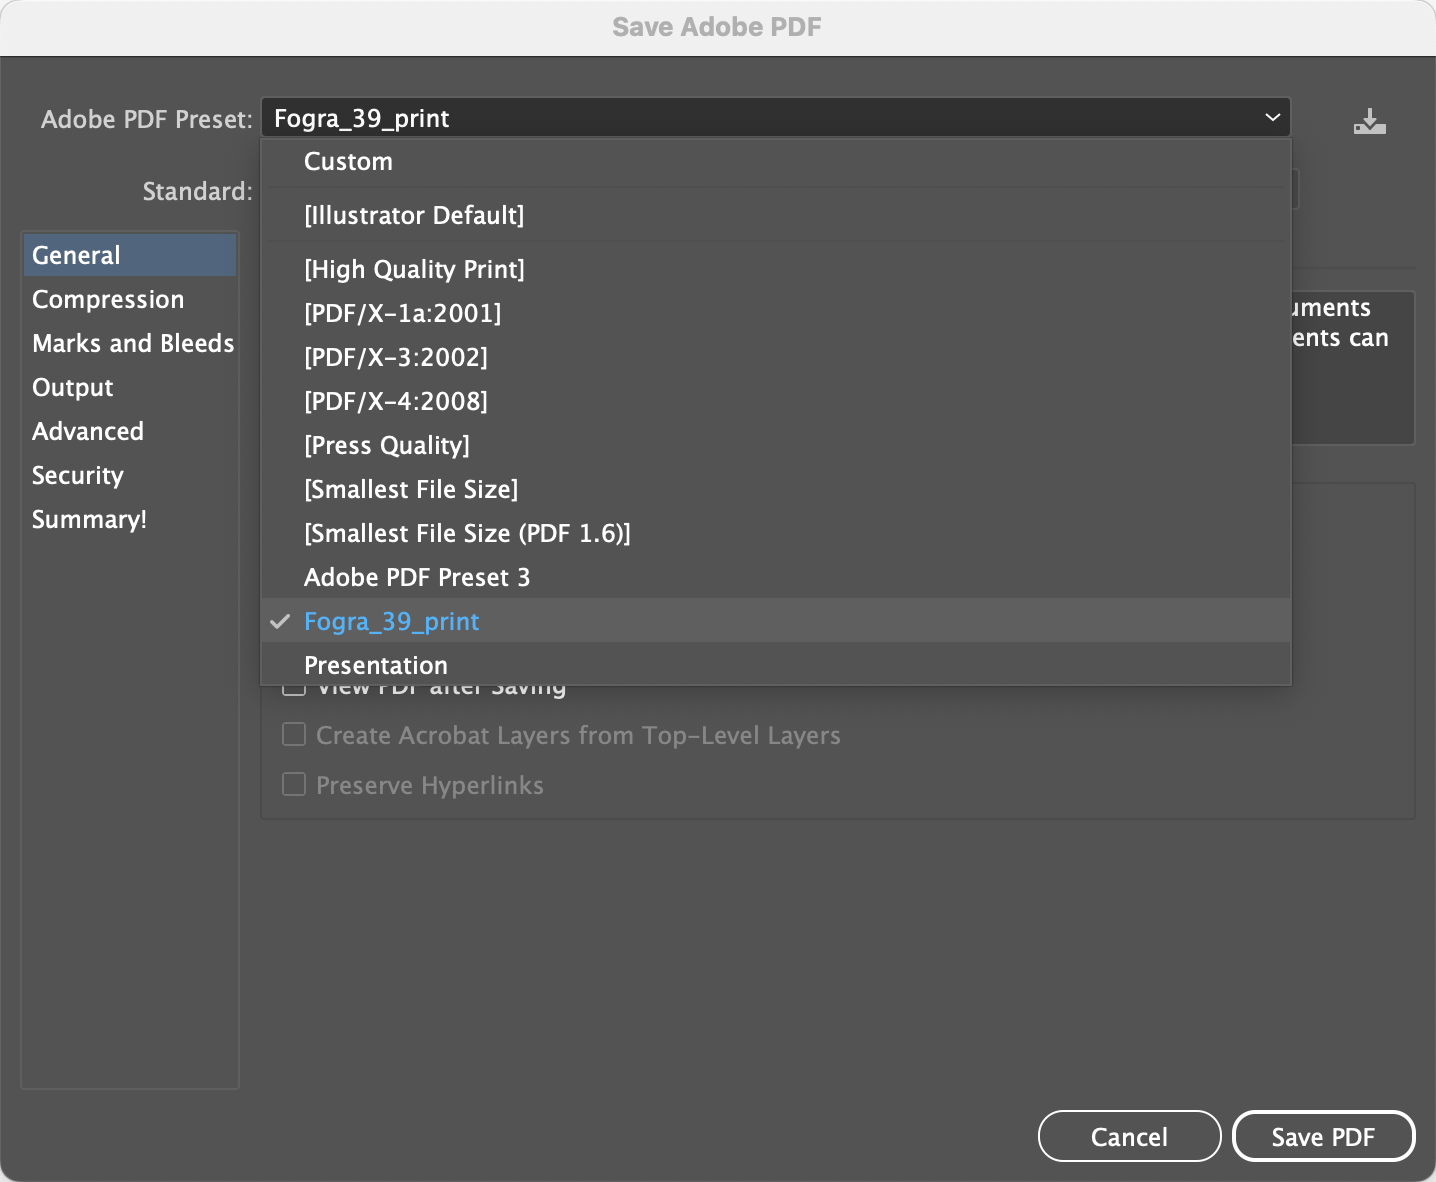
Select the settings to save the PDF
After clicking “Save” (see previous item), the Adobe PDF settings dialogue box will appear. In this window, on the right side, find the “Adobe PDF Preset” drop-down menu and select “Fogra_39_Print”. After selecting the necessary preset, click the “Save PDF” button.
-
Done
The layout is saved and ready to be sent to the printing house. It already contains the required colour space, resolution, trimming allowances and other technical nuances important for printing.
Saving the layout for medium print formats
The instructions are suitable for A1 and A0 size light boxes.
-
Select all objects on the layout
Use the cursor or the keyboard shortcut Cmnd+A.
-
Rasterise selected objects with 150 ppi resolution
To merge the layout into one image (i.e. rasterise it), open the menu at the top of the software window. Click “Object” and then select “Rasterise” in the drop-down menu.
After that a dialogue window with rasterisation settings will appear. Choose the settings as shown on the screenshot. Now the layout is merged into one image, and we won't lose any elements when printing.
-
Save a copy of the layout in PDF format
Find the “File” item in the Adobe Illustrator menu. Select “Save As” in the drop-down menu. Change the file name from “Edit” to “Print” to avoid confusion. In the “Format” drop-down menu select “Adobe PDF” (pdf) and click “Save”.
-
Select settings for saving PDF
After clicking the “Save” button (see previous item), the Adobe PDF settings dialogue box will appear. Find the “Adobe PDF Preset” drop-down menu in this window, on the right side and select “Fogra_39_Print”. After selecting the desired preset, click the “Save PDF” button.

-
Done
The layout is saved and ready to be sent to the printing house. It already has the required colour space, resolution, trimming allowances and other technical nuances important for printing.
Saving the layout for outdoor advertising
The instructions are suitable for city formats and billboards. We save a billboard differently because of the nuances of the layout. We will talk about it in the next section.
-
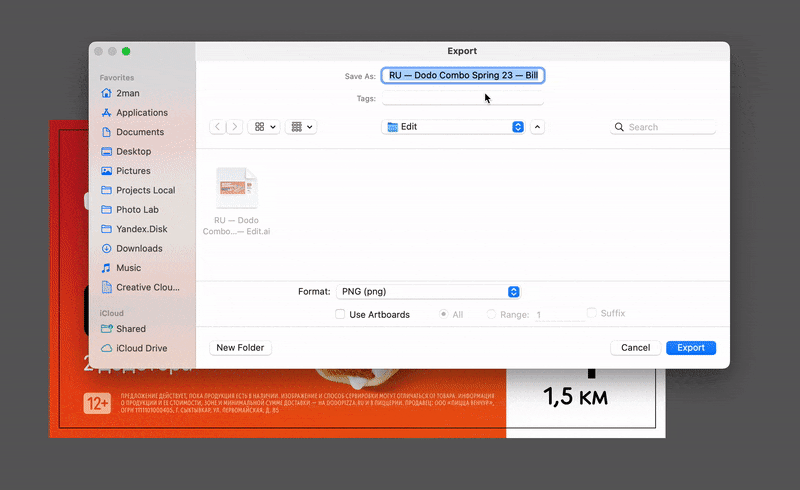
Export the layout to TIFF format
Open the menu at the top of the Adobe Illustrator window and find the “File” item. Select “Export” and then “Export As” in the drop-down menu.
In the “Export As” window, change the file name from “Edit” to “Print” to avoid confusion.
In the drop-down menu “Format” select “TIFF” (tif) and click the “Export” button. Make sure that the “Use Artboards” option is off (unchecked) to save the layout with trimming allowances.

-
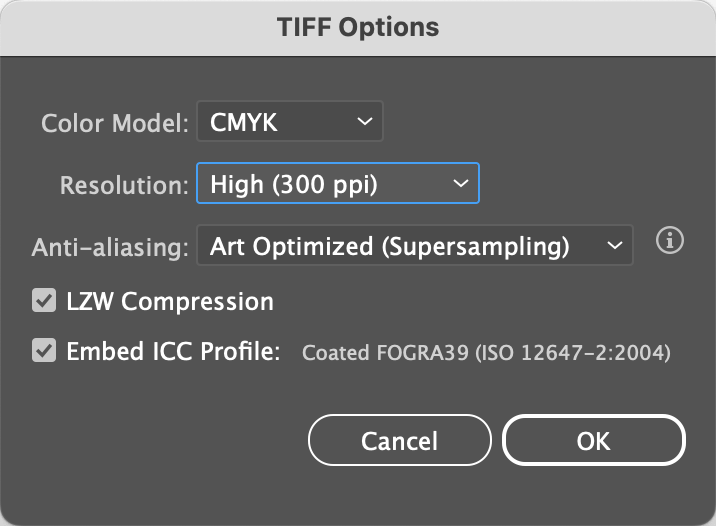
Assign settings for saving TIFF
Select the same settings as in the screenshot and click "ok".

-
Done
The layout is saved and ready to be sent to the printing house.
Saving the billboard layout
We assemble the billboard layout in the ratio of 1:10, as previous versions of Adobe Illustrator do not support sizes larger than 5 metres.
This does not affect the quality of printing. The key thing is to save the layout with the correct settings and enlarge it 10 times before printing.
-
Export the layout to TIFF format
Open the menu at the top of the Adobe Illustrator window and find the “File” item. Select “Export” and then “Export As” in the drop-down menu. In the “Export As” window, change the file name from Edit to Print to avoid confusion.
In the “Format” drop-down menu, select “TIFF” (tif) and click “Export”. Make sure that the “Use Artboards” option is off (unchecked) to save the layout with allowances.
-
Assign settings for saving TIFF
Select the same settings as in the screenshot and click "ok".
-
Done
The layout is saved and ready to be sent to the printer.
Read next: