
How to save layouts for replication
We save layouts in several forms: for editing, publishing, preview, printing, and for partners. Here are video tutorials and an outline.
- Processis a copy of the master layout where everything can be edited.
- Edit- the layout where partners edit some elements.
- Publish- the layout for publishing in digital advertising, social networks and on restaurant screens.
- Preview- for previewing printing formats.
- Print- for printing.
We save digital layouts in Process, Edit, Publish.
Printing layouts - in Process, Edit, Print and Preview.
From this video you will know how to save them. A detailed outline is below.
How to save Process
Process is a copy of the master layout. Everything is editable in it. The photos are linked by a PSD file. Fonts are left as fonts, shadows, gradients, fades are not reduced.
- Copy the contents of the master layout to resize the template.
- Leave all the links and objects editable.
- Save the layout in the latest Adobe Illustrator version.
How to save Edit
Edit is a layout for partners: they can edit individual elements here. The difference with the Process is that the background is rendered and embedded within the clipping mask. Thus, partners can open and edit the layout without downloading any links.
- Open the Process layout.
- Leave the price tags, fonts, shadows and gradients editable.
- Dodo-fonts are not converted to curves: they are editable.
- If we’re not the font owners and there is no need to edit the text, we convert it into curves. Thus we will not violate the copyright, and our partners won’t have to buy it. Examples: headline, campaign or product name.
- If we’re not the font owners and the text should be edited, add a download link for the font to the Edit folder. Keep it right next to the layout for editing. You can do this with the help of the "Read Me" text file. Choose fonts with an open license, so that the partners won’t have to buy them.
- Rasterize the background inside the clipping mask through "Object → Rasterize...". We rasterize the layouts for different media as follows:
- Digital layouts - 150 ppi. In this case the background can be enlarged, but the image won’t lose the quality.
- Lightboxes - 150 ppi.
- Small print media - 300 ppi. For example, flyers, table tents, checkout posters, A3 ads.
- Billboard - 300 ppi. It’s ten times less in the template and when printed, the layout is enlarged to the required 30 ppi.
- Outdoor - 72 ppi. For example, city-formats and billboards.
- Save a copy of the layout through "File → Save a Copy..." in the latest version of Illustrator.
- Change "Process" to "Edit" in the file name.
How to save Publish
Publish is a layout for publishing in digital ads, social networks and on restaurant screens.
- Open the Edit layout.
- Export it to JPEG through "File → Export → Save for Web (Legacy)...".
- Select settings as shown on the screenshot.
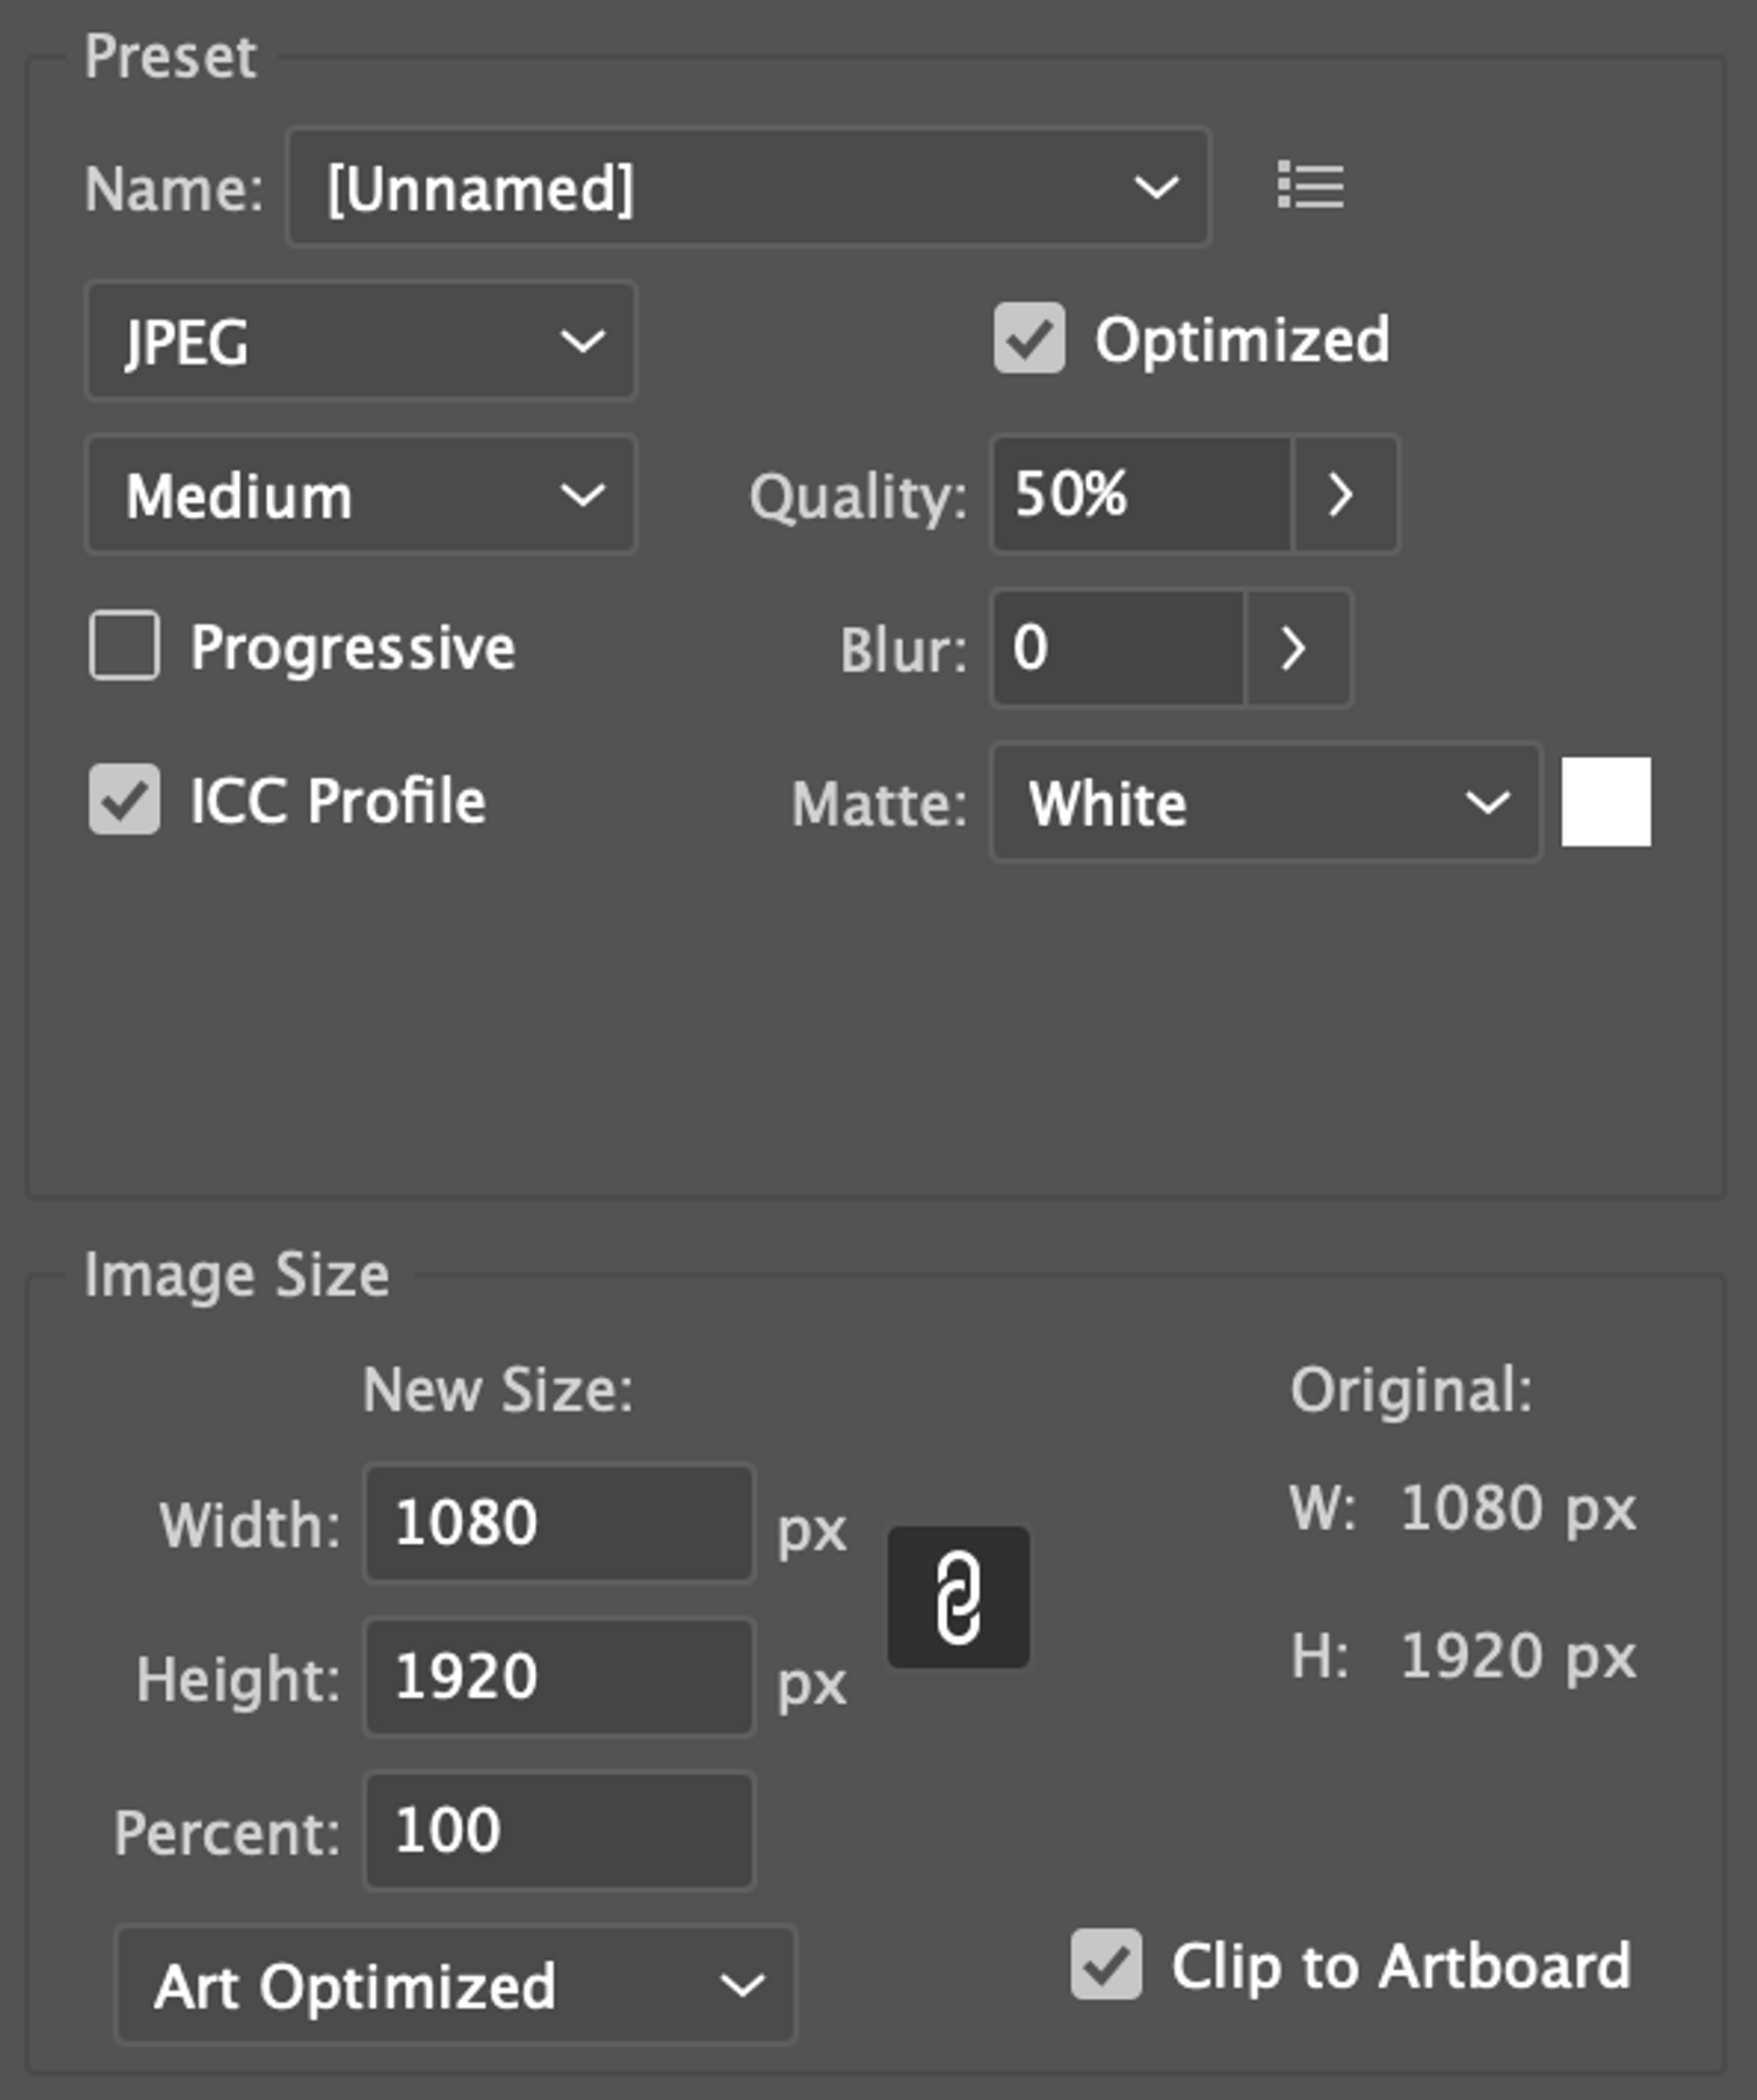
100% scale for digital layouts - Keep the file size within 500-900 KB. The size limit for previews in the Knowledge Base is 1 Mb. It allows to make Publish online uploads faster and you can use it instead of Preview to upload to the Knowledge Base.
- Change "Edit" to "Publish" in the file name.
How to save Preview
Preview is a file type used for previewing printing formats.
- Open the Edit layout.
- Export it to JPEG through "File → Export → Save for Web (Legacy)...".
- Choose the settings as shown on the screenshot.
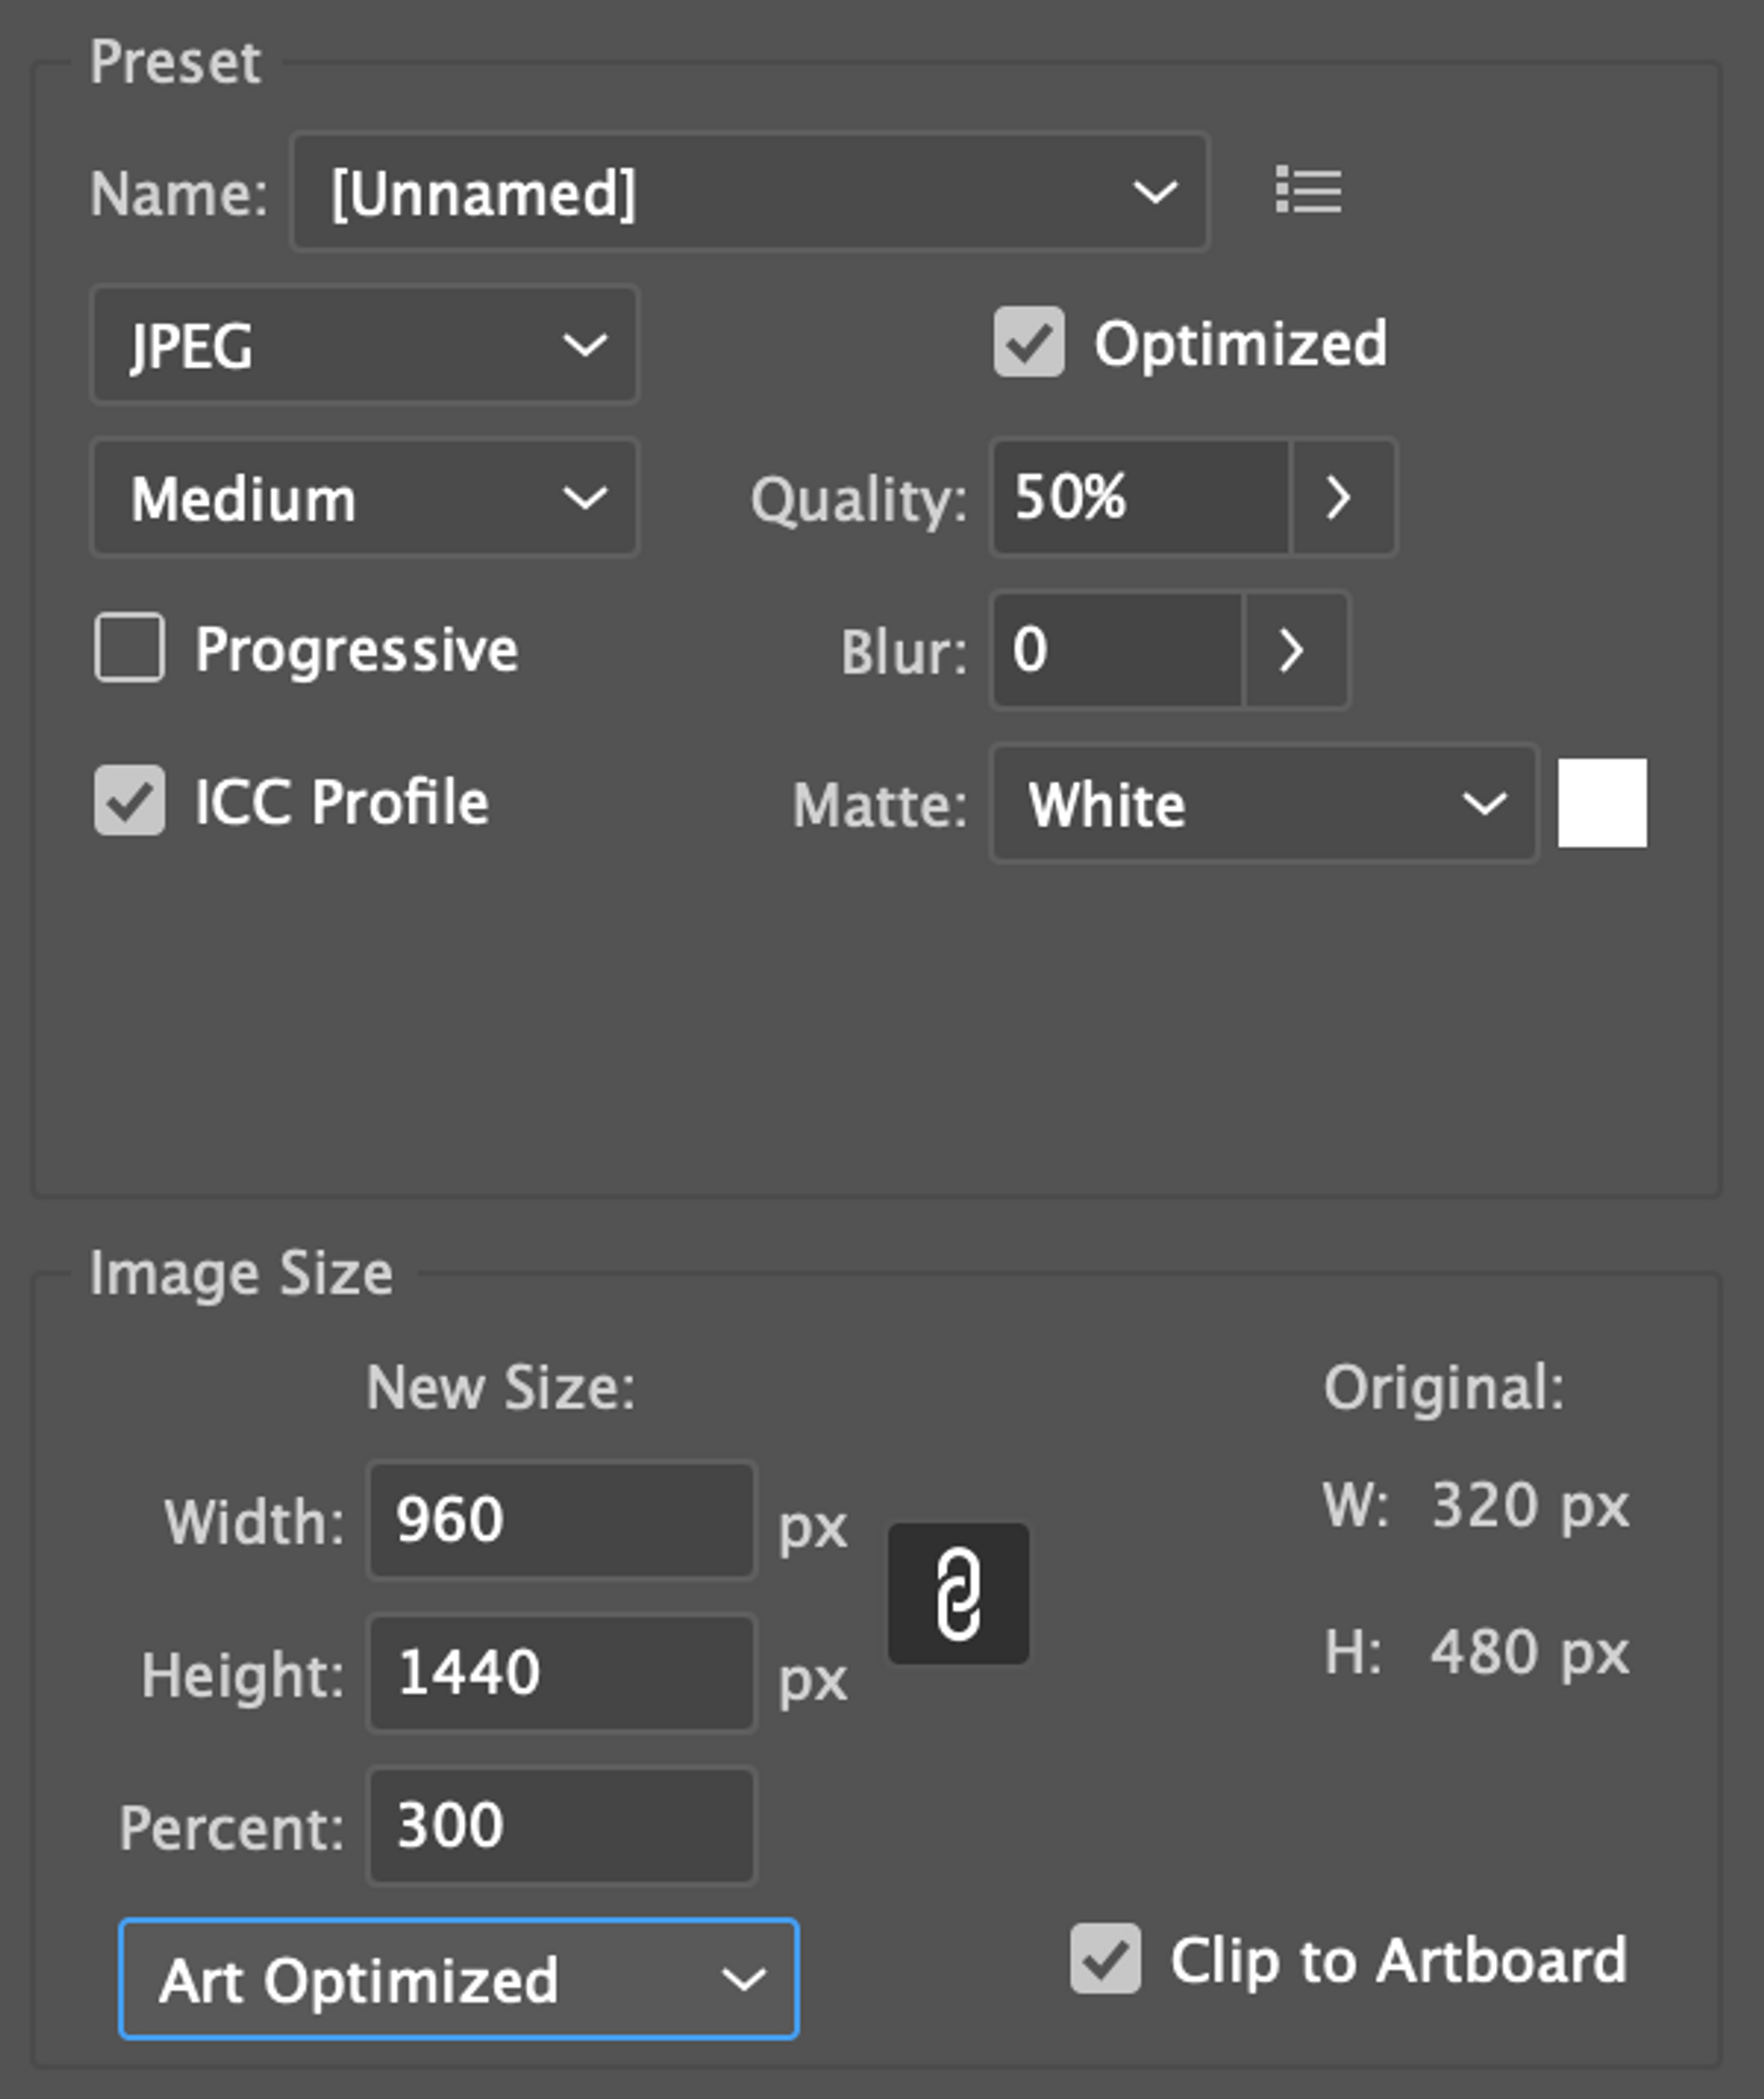
Change "Edit" and "Preview" in the file name. - Keep the file size within 500-900 KB. There is a 1 Mb size limit for previews in the Knowledge Base.
- Change "Edit" and "Preview" in the file name.
How to save Print
Print is a layout for printing. We don't save Print if something is to be changed. We put everything into the Edit file first before printing, and save it into Print after that.
If there’s nothing to change in the layout – save it to Print.
Open the Edit layout.
Select all the objects in the layout and rasterize them: "Object → Rasterize...". The entire layout has to become a single image.
- Lightboxes - 150 ppi.
- Small print media - 300 ppi. For example, flyers, table tents, checkout posters, A3 ads.
- Billboard - 300 ppi. It’s ten times less in the template and when printed, the layout is enlarged to the required 30 ppi.
- Outdoor media - 72 ppi. For example, city-formats and pillars.
We save small print media and lightboxes as a PDF copy. For example, flyers, table tents, checkout posters, A3 stands, tray cloths, wobblers, and lightboxes.
- Download the preset for quick saving.
- Open the preset file with Adobe Illustrator: Right Click → Open with → Adobe Illustrator.
- You won’t detect any changes – and that’s OK. The preset appears on the list when you save the layout in all Adobe programs through File → Save As... → Adobe PDF
- When saving, select your file on the list and click "Save PDF".
Billboards and outdoor layouts - save as a copy in TIFF. For example, city formats and billboards.
- Choose TIFF format: File → Export → Export As... → TIFF.
- Uncheck "Use Artboards”. Otherwise the layout will be cropped by the artboard and the printer will not have any trimming allowance.
- We choose the following settings: 300 ppi for the billboard and 72 ppi for all other media.
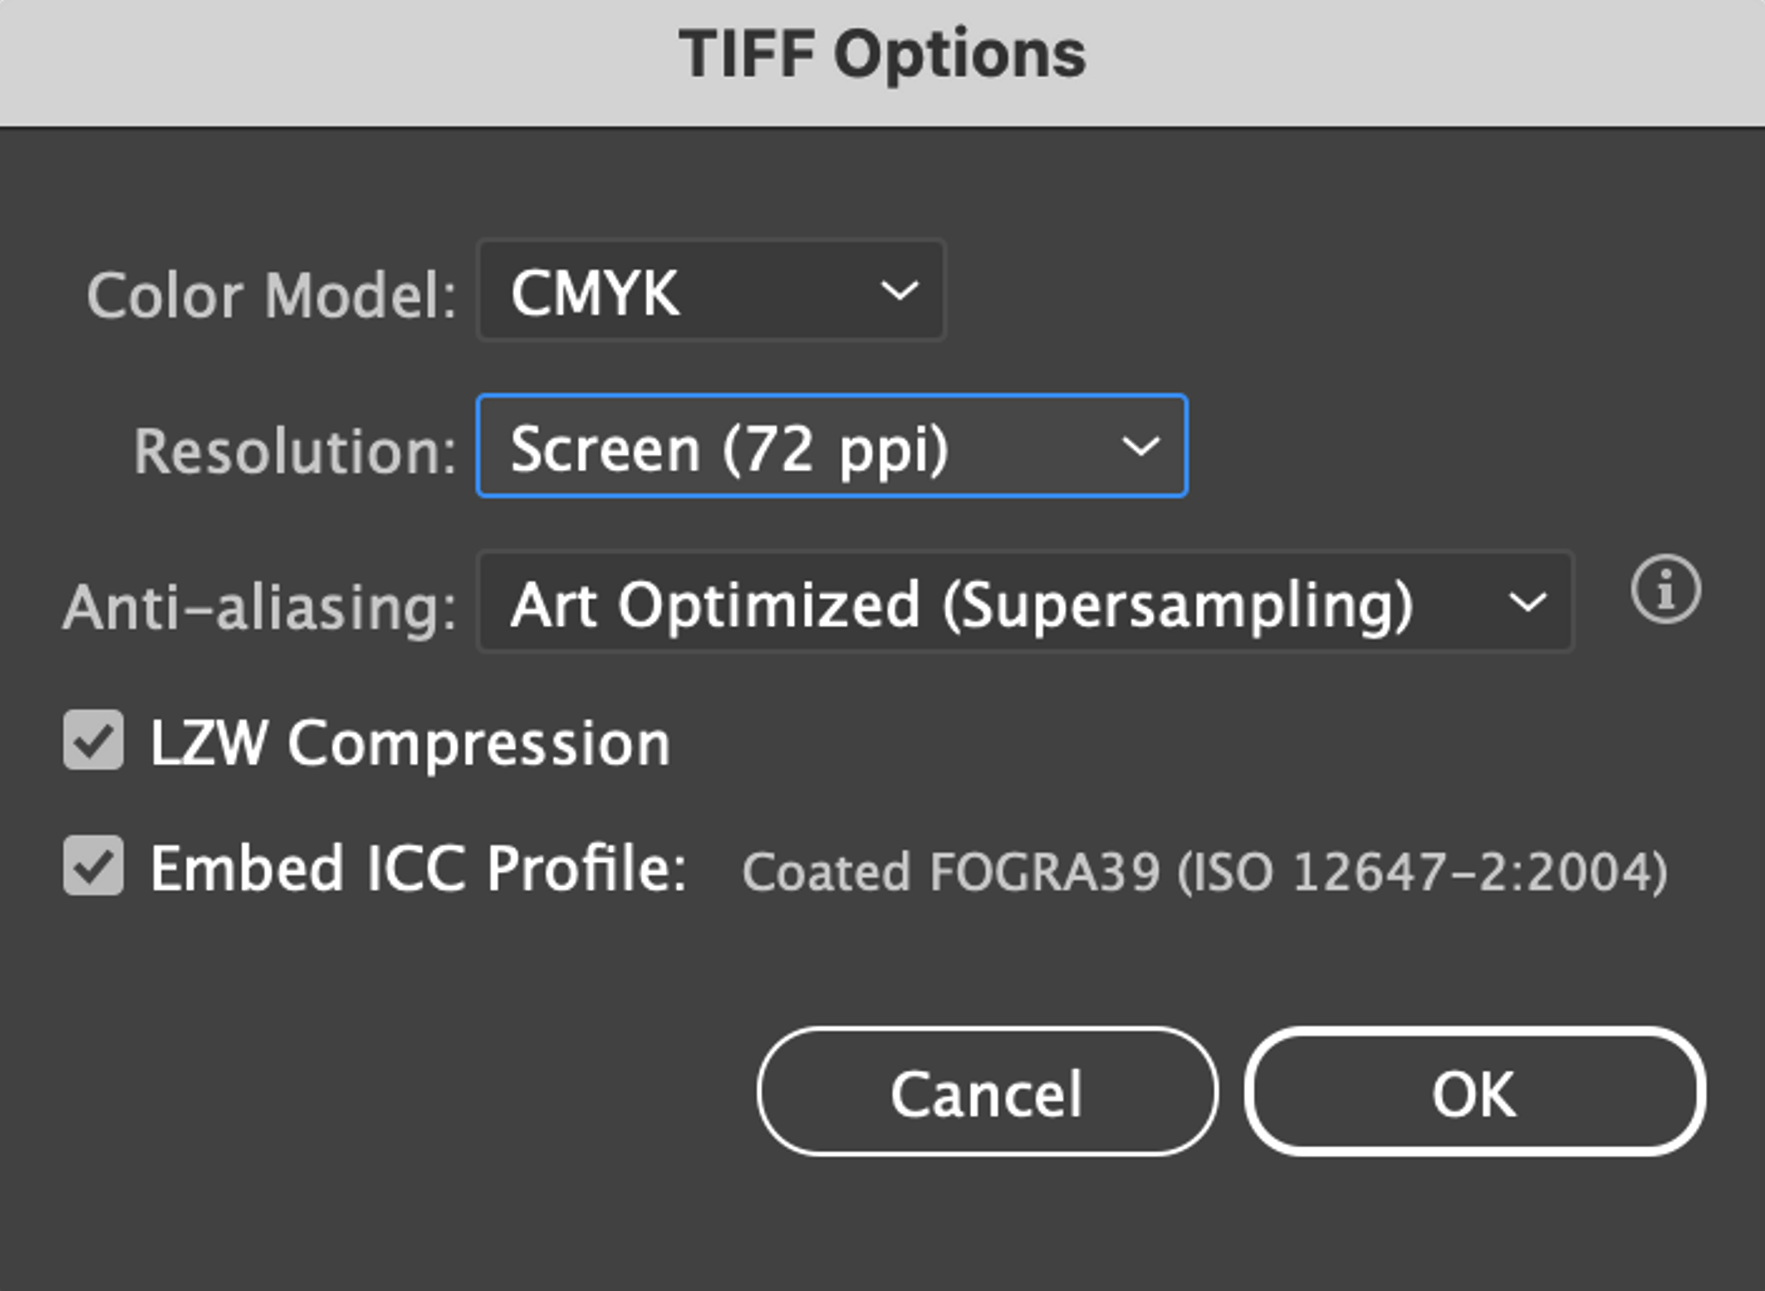
Settings for all outdoor ads except for a billboard 
Settings for a billboard - Change "Edit" to "Print" in the file name.
Read next: