
How to configure a preset for saving to PDF
We need a preset so that we won't have to configure the PDF settings manually when saving it.
- Make a preset. Open in Adobe Illustrator with the right mouse button and "Open with". The preset will appear on the list when you save the layout through "Save As... → Adobe PDF". When saving, just select it and click the "Save PDF" button.
Sometimes a preset does not work automatically, in which case you will have to save it manually.
- Set it manually. Make the settings in the window of saving options as shown below on the screenshots.
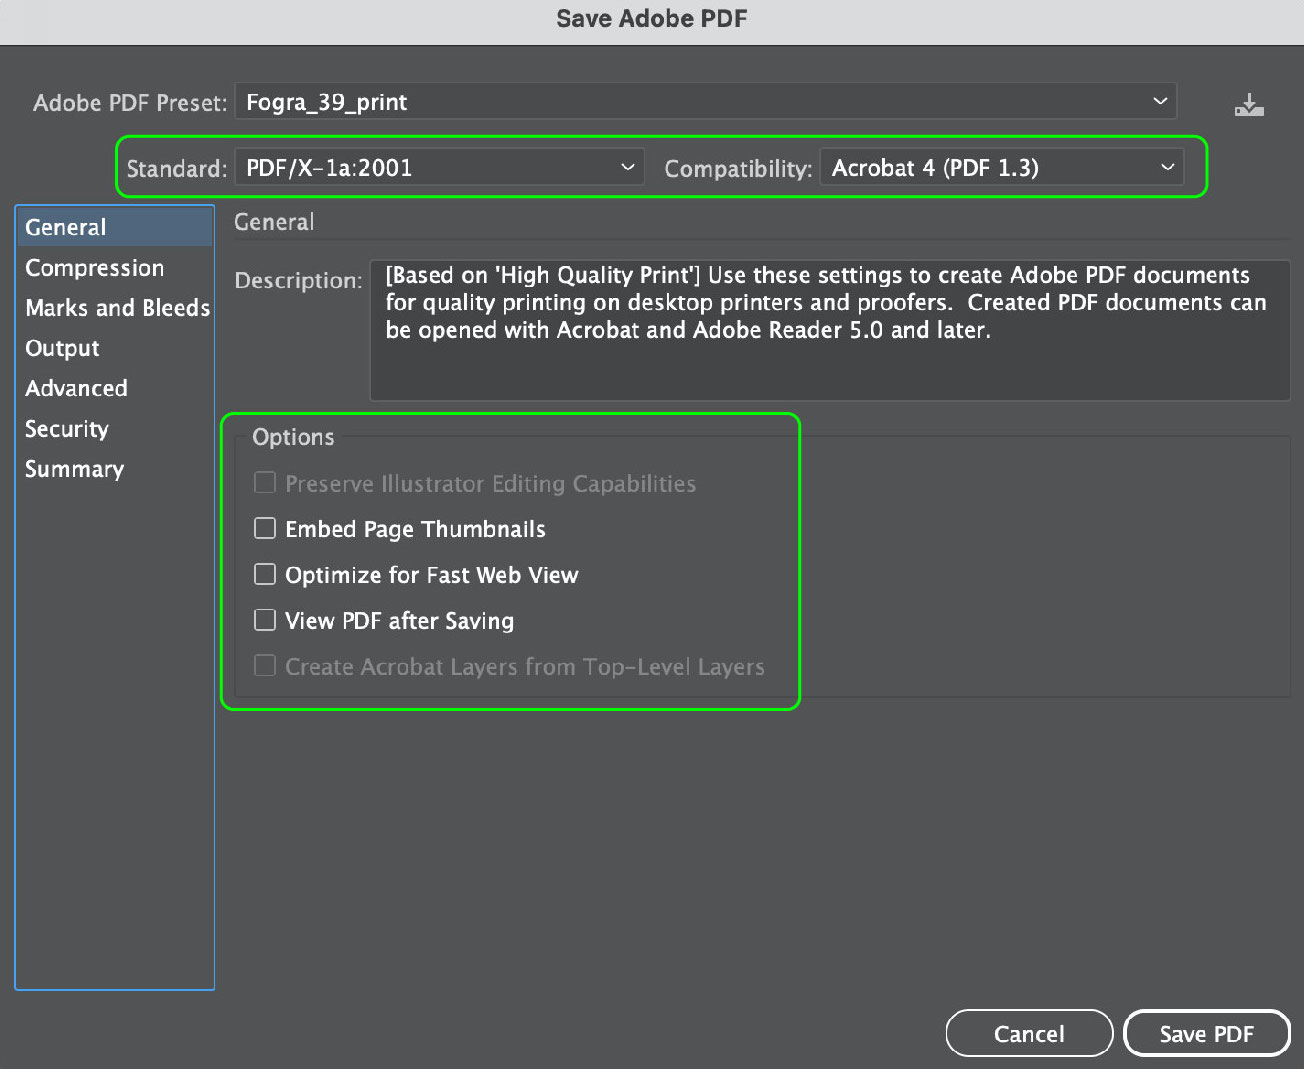
General 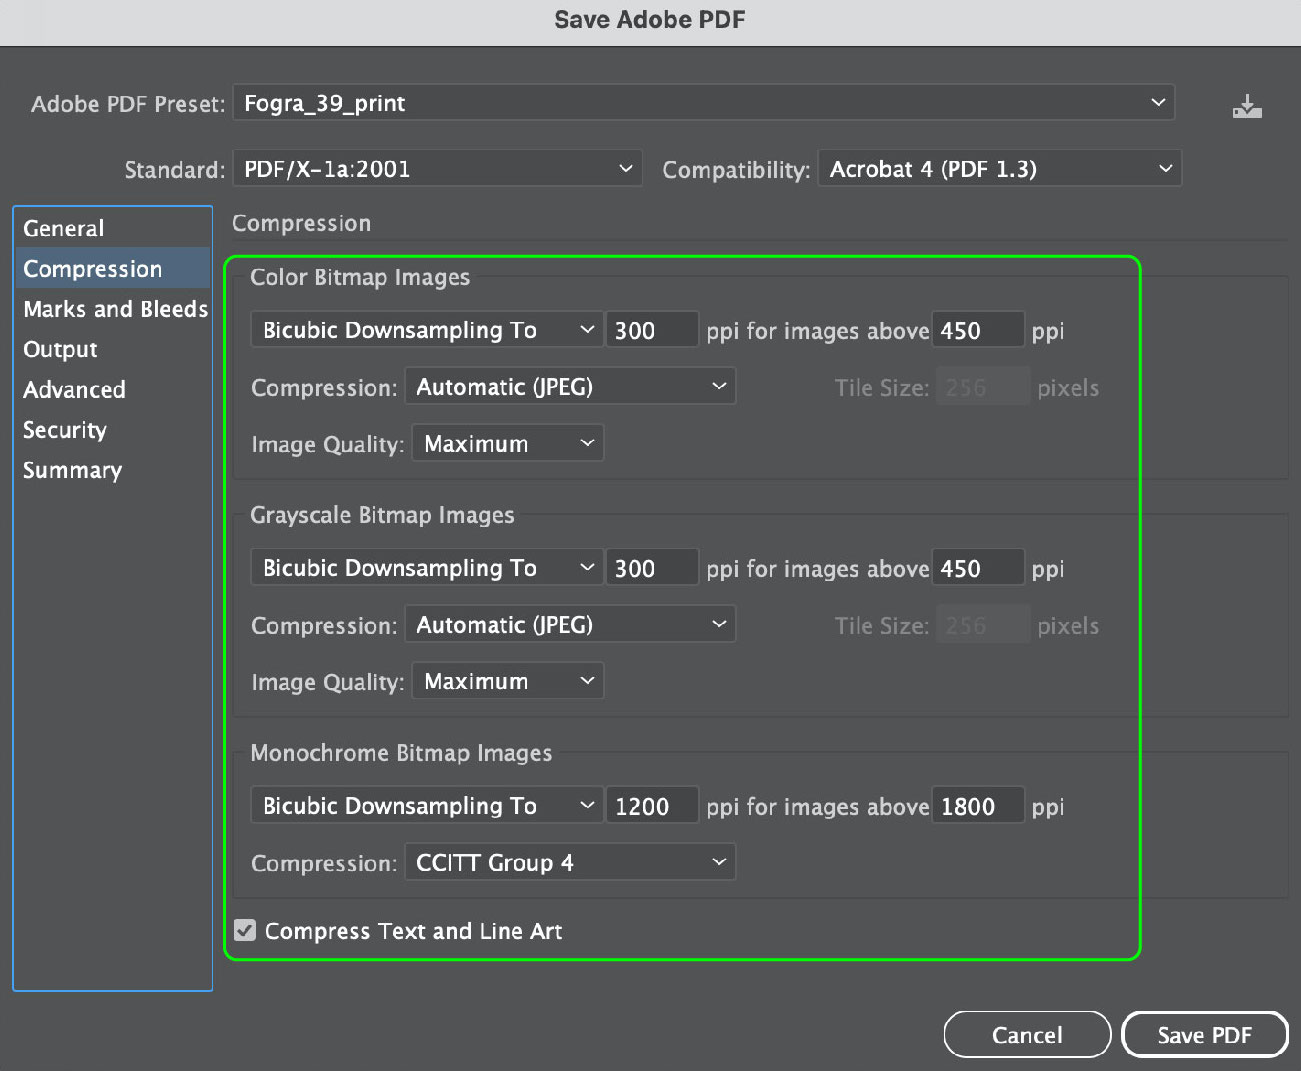
Compression 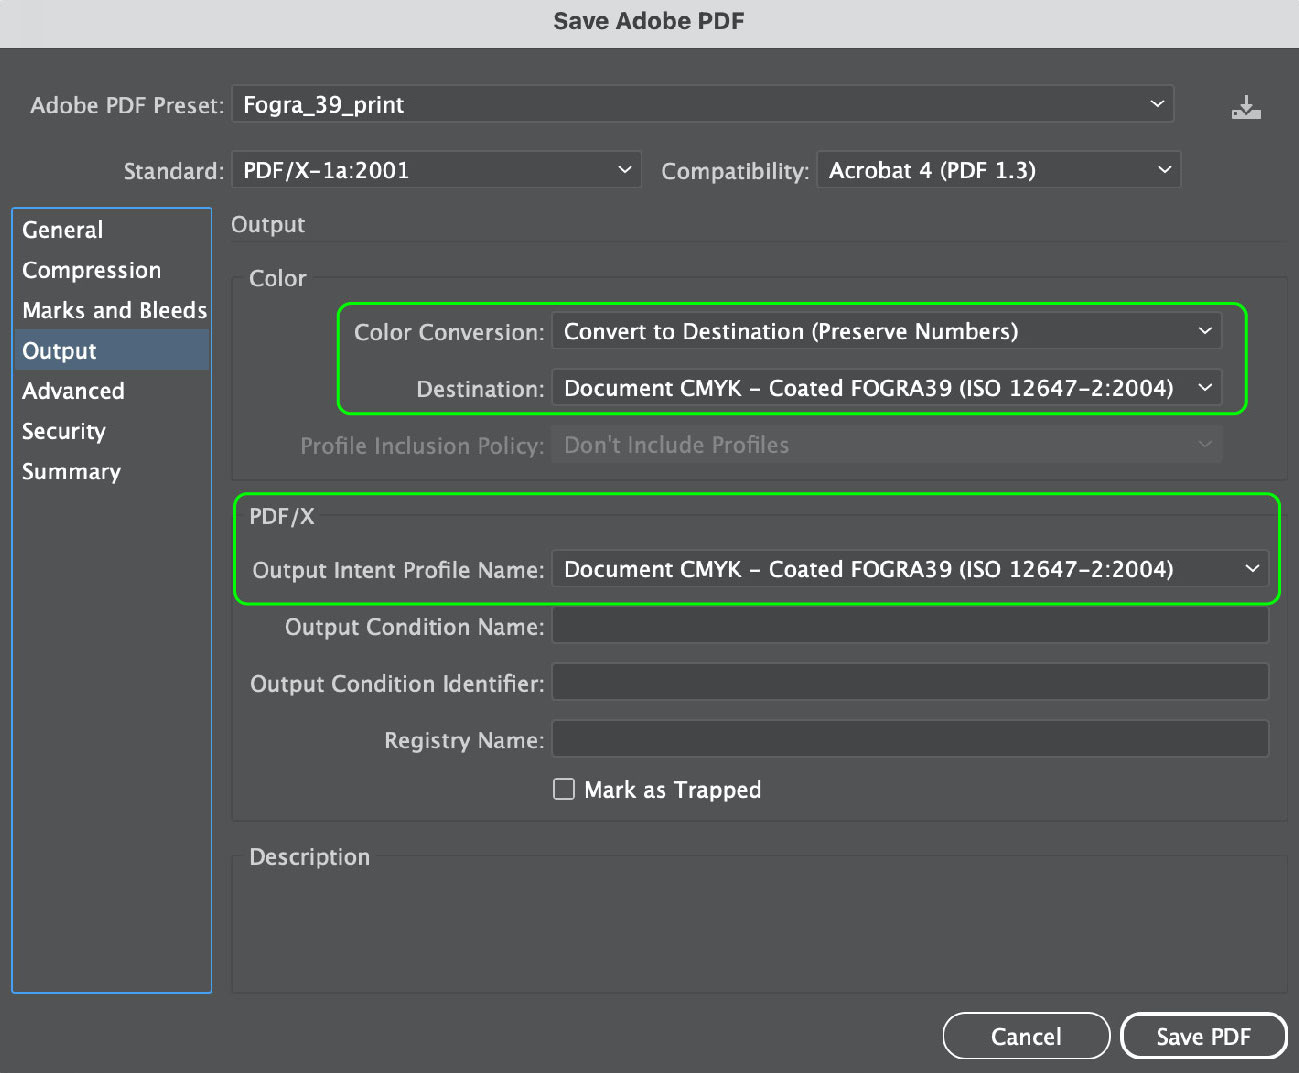
Output 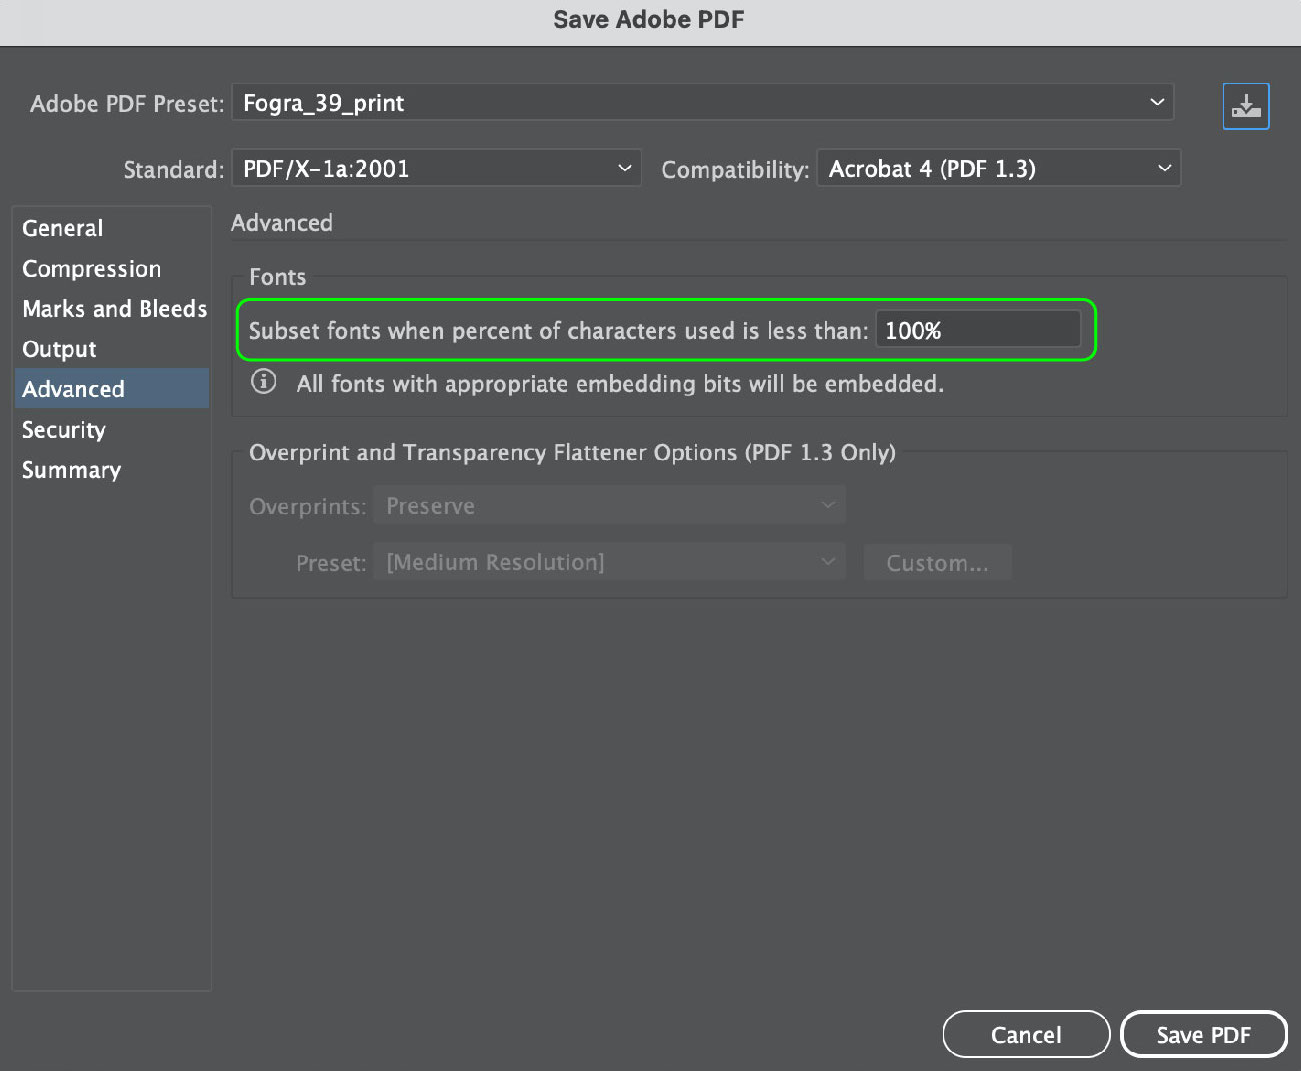
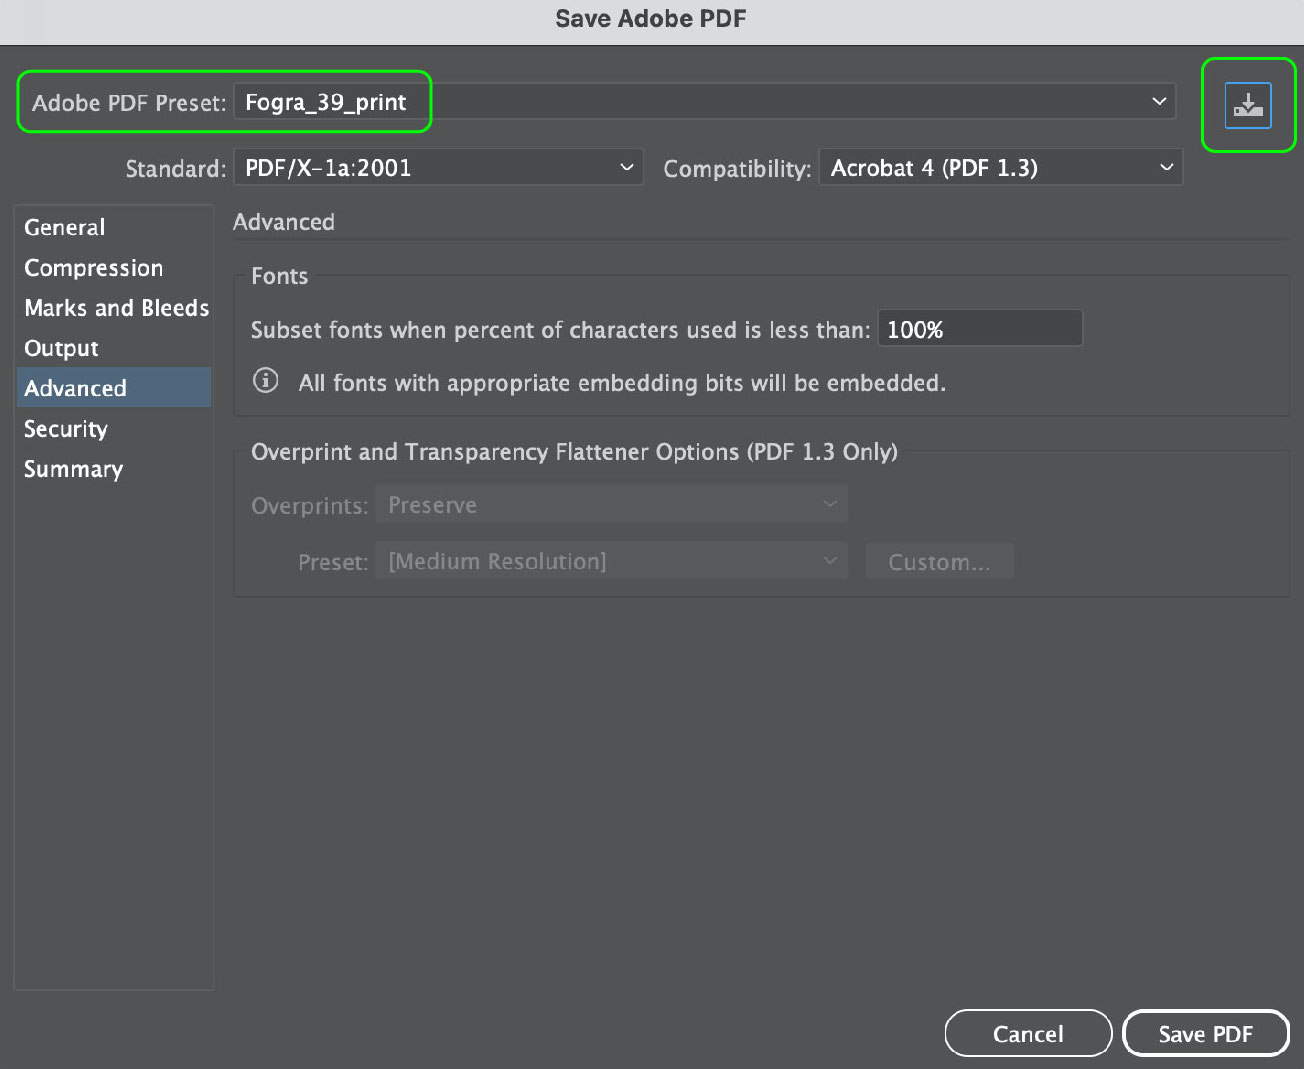
Advanced 
Marks and Bleeds There is a little trick with the window "Marks and Bleeds": when you choose "Use Document Bleed Setting", the allowances you set in the document settings are used. You can see them in "File → Document Setup...".
If the document does not initially have the bleeds set, it just won’t work. In this case, you can use templates that already have the necessary settings.
- Save the preset. The button to save a preset is on the top right. Press it and give it any name you want. We use "Fogra_39_print" after the color profile you assign when saving. It is suitable for most printers in Eurasia. It is better to specify the profile at the printing house.
Saving the layout