Neon
How to adjust to the local market and prepare neon signs for production. The guide contains step-by-step instructions with illustrations.
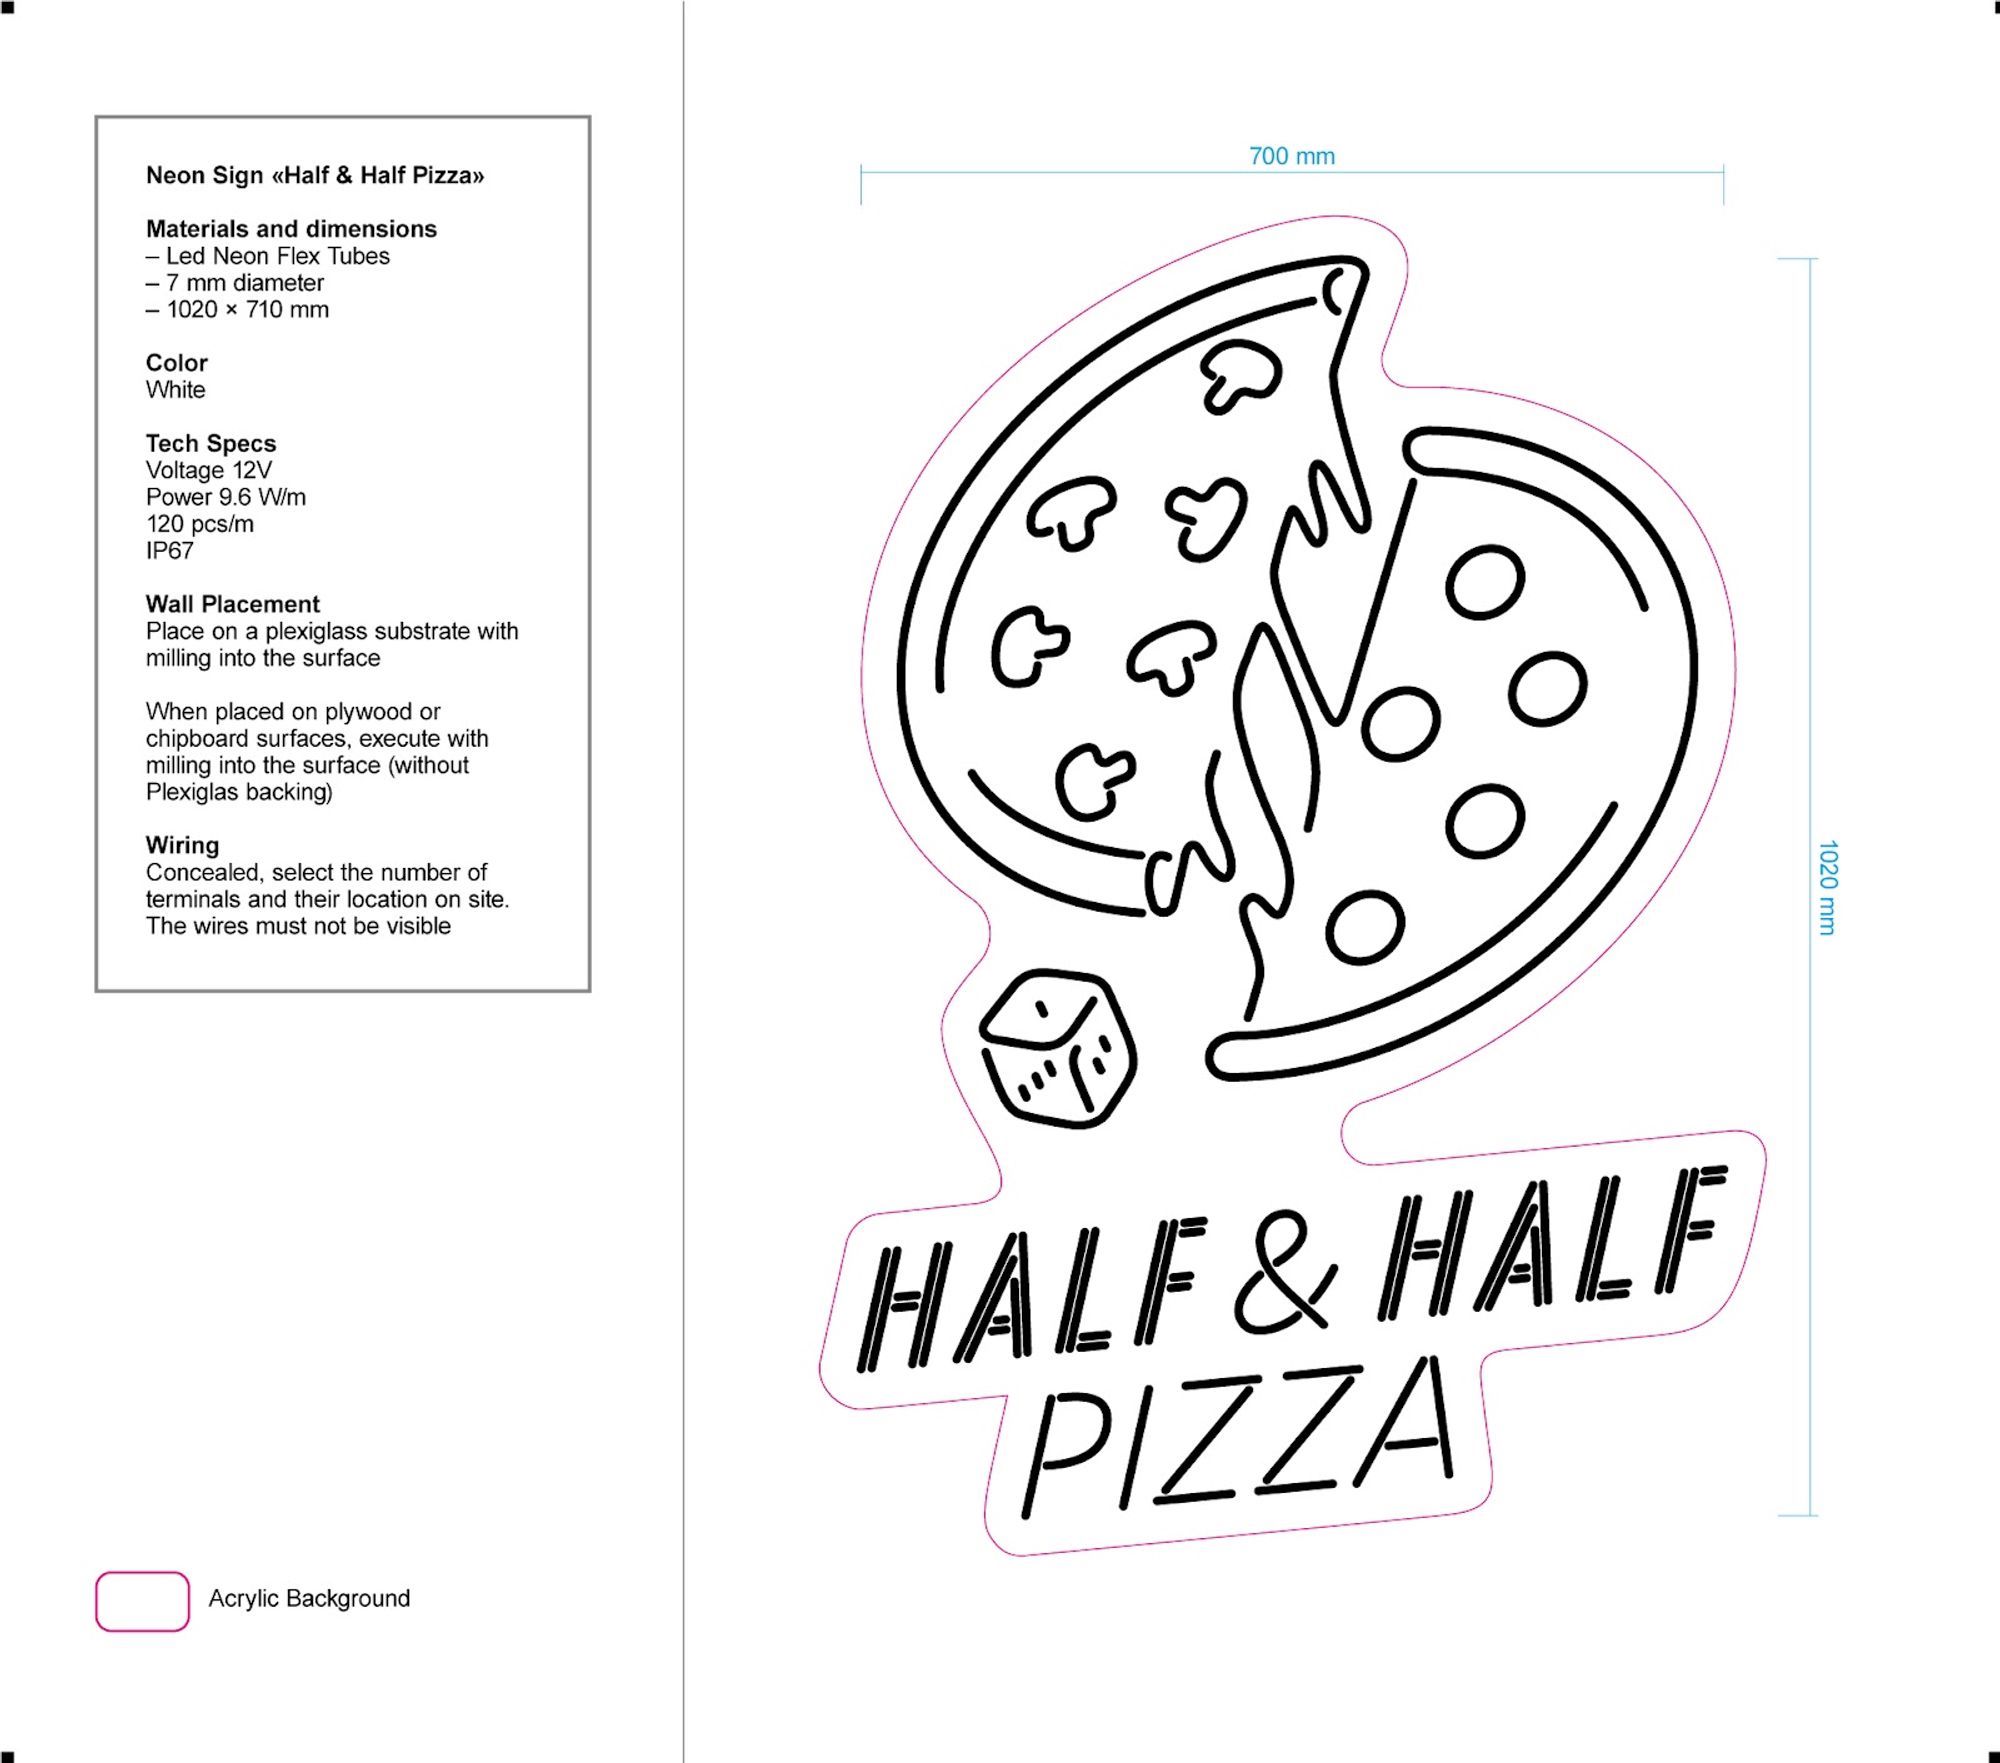
Let's take a look at how to insert text in the local language and properly save the layout for production using the “Half&Half Pizza” interior decor neon as an example.
Before you start editing the layout, prepare a translation of the text into the local language if English is not the main language in your country.
1. Download layout from the Edit folder
All neon sign layouts are stored in the “Neons” folder. Download the layout and open it in Adobe Illustrator. You will need the “Edit” file to edit the layout.

2. Determine the language
We provide layouts with text in English. If English is not the primary language in your country, translate the text into the local language.
If the English version works well for you, go straight to step 6.
3. Insert the text translation
00:45 Go to the “Neon Tubes” layer: it contains both text and illustration. Notice the difference in font use: the text on the top line is in a narrow font (30), while the text on the bottom line is in a wide font (60).
The “boldness” of the font also differs: in the upper line we use letters drawn with two lines, in the lower line - with one line. You can view and select the necessary type of letters in the “Glyphs” menu. There's a second way: to use “double” letters, turn on “Caps Lock”; in regular mode, letters drawn with a single line will appear.
01:36 Paste each part of the translation into the corresponding line, similarly to the English version.
4. Adjust acrylic background to the text
02:00 Text and illustration are placed on the acrylic background; it is marked with a pink line on the layout. If the text has visually changed after translation and occupies less or more space on the background, adjust the line to the text block.
Split the background into two parts
02:20 Go to the “Acrylic Background” layer and split the background into two parts. You need to do this to edit only the part that contains the text. Here's how to do it.
Use the “Direct Selection” tool or press the “A” key and select the points on the background outline. Select the “Scissors” tool and click on the point (path node) where you want to make the cut. Connect the two points to separate the top and bottom of the background path.
The outline around the illustration and the outline around the text can now be edited separately from each other. Delete the outline around the text.
Create a new outline
02:45 Make a copy of the layer with the text. Convert the text on the new layer to curves, and then go to “Menu - Object - Path - Offset Path” to build an additional path. The “Offset” field should have a value of 28 mm.
03:40 Merge the shape. To do this, go to the “Pathfinder - Shape Mode – Unite” panel. Move the shape under the text.
04:00 Draw a rectangle around the shape. Select the “Pen” tool and draw a rectangle around the outermost points of the shape. After that, remove the background with the extra outline.
04:28 Merge the path of the illustration with the new path of the underlying text. First pull out the bottom of the illustration path, then move the new path from the “Neon Tubes” layer to the “Acrylic Background” layer and merge the paths in the “Pathfinder - Shape Mode – Unite” panel.
05:07 Round the corners of the contour. Select a radius of 30 for the outer corners and 20 for the inner corners. On the right side, you can round the inside corners completely to make a smoother transition.
5. Specify the new neon dimensions
05:47 If the width of the text and outline have changed, specify the new dimensions in the “Dimensions” layer.
6. Save the layout
06:45 Save the version for editing by selecting “Save as”. Replace the country code and layout width in the file name. The updated “Edit” file will come in handy if you find an error and decide to make changes to the layout.
For production, prepare a “Print” file:
- Expand the font and illustration using the “Object – Expand” menu.
- Save the layout in Adobe PDF (pdf) format, change the ending of the file name from “Edit” to “Print”.
7. Done!
The layout is ready. Send the “Print” file to the production specialists.
Read next:
