
Adding reflexes to layouts
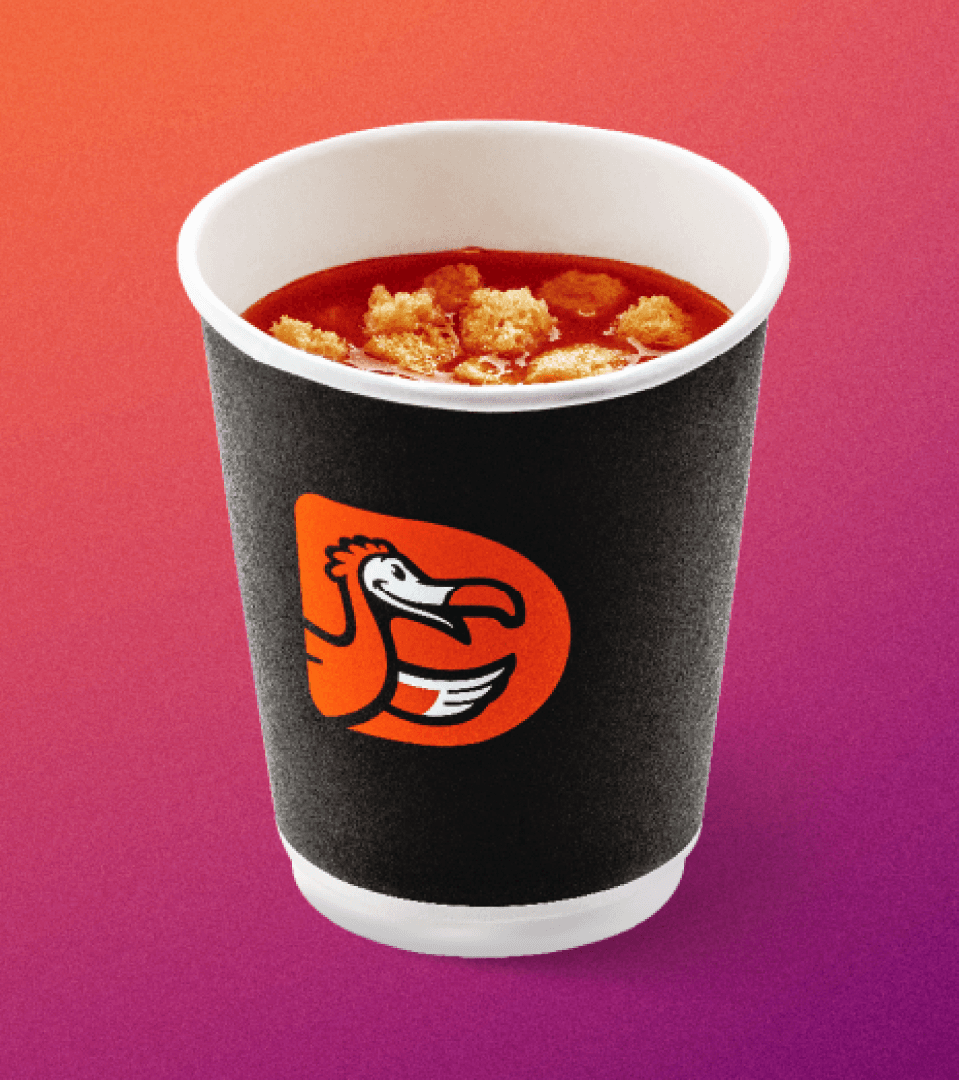
Vivid food photos whet the appetite and capture the customers’ attention. If we don’t have the opportunity to take a food photo for a specific design, we create a layout with catalog photos, taken on a white background, and then add reflexes. Reflexes give the picture volume and depth, helping it to fit naturally into promotional materials.
What is reflex
a reflex is an optical effect that occurs when light interacts with the environment and objects in a photograph. Reflexes appear when light rays hit a surface or light refracts through a different environment.
Let's imagine you are shooting a cup of hot coffee on a table. When light from some source (a window or a lamp) falls on the surface of the table, it is reflected and creates a reflex in the photo. the result is a bright area in the picture – this is the reflex. In our example with coffee, the reflex can create a sparkling spot on the liquid or on the cup itself.
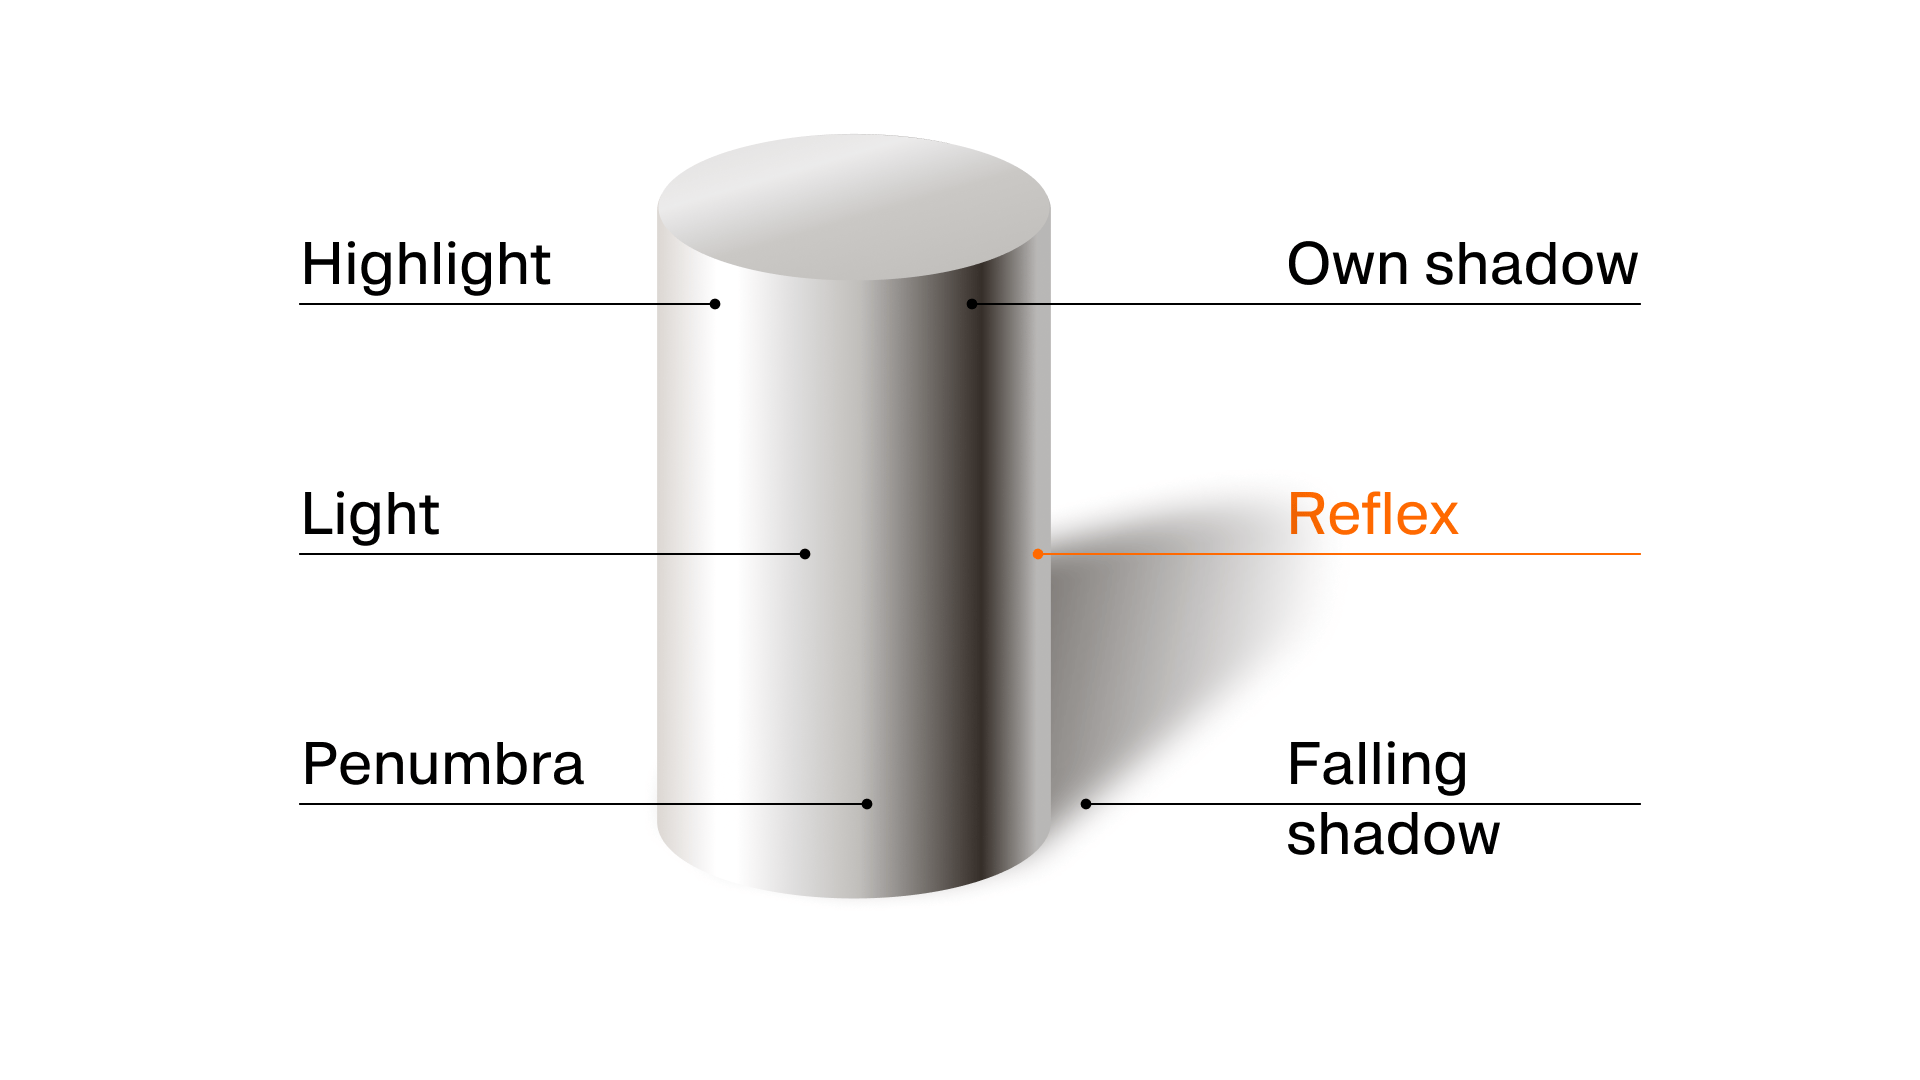
Reflexes have different shapes and sizes depending on the shape and texture of the surface and the angle of incidence of light. For example, if the table is smooth, the reflex will be bright and shiny; if the surface is rough or matte, the reflex will be duller and blurred.
Why add reflexes to a photo
Reflexes add appeal and realism to a layout assembled from catalog photos. They create an illusion of space, make the image more three-dimensional, give it depth and volume, and outline texture. This makes food look more alive and appetizing.
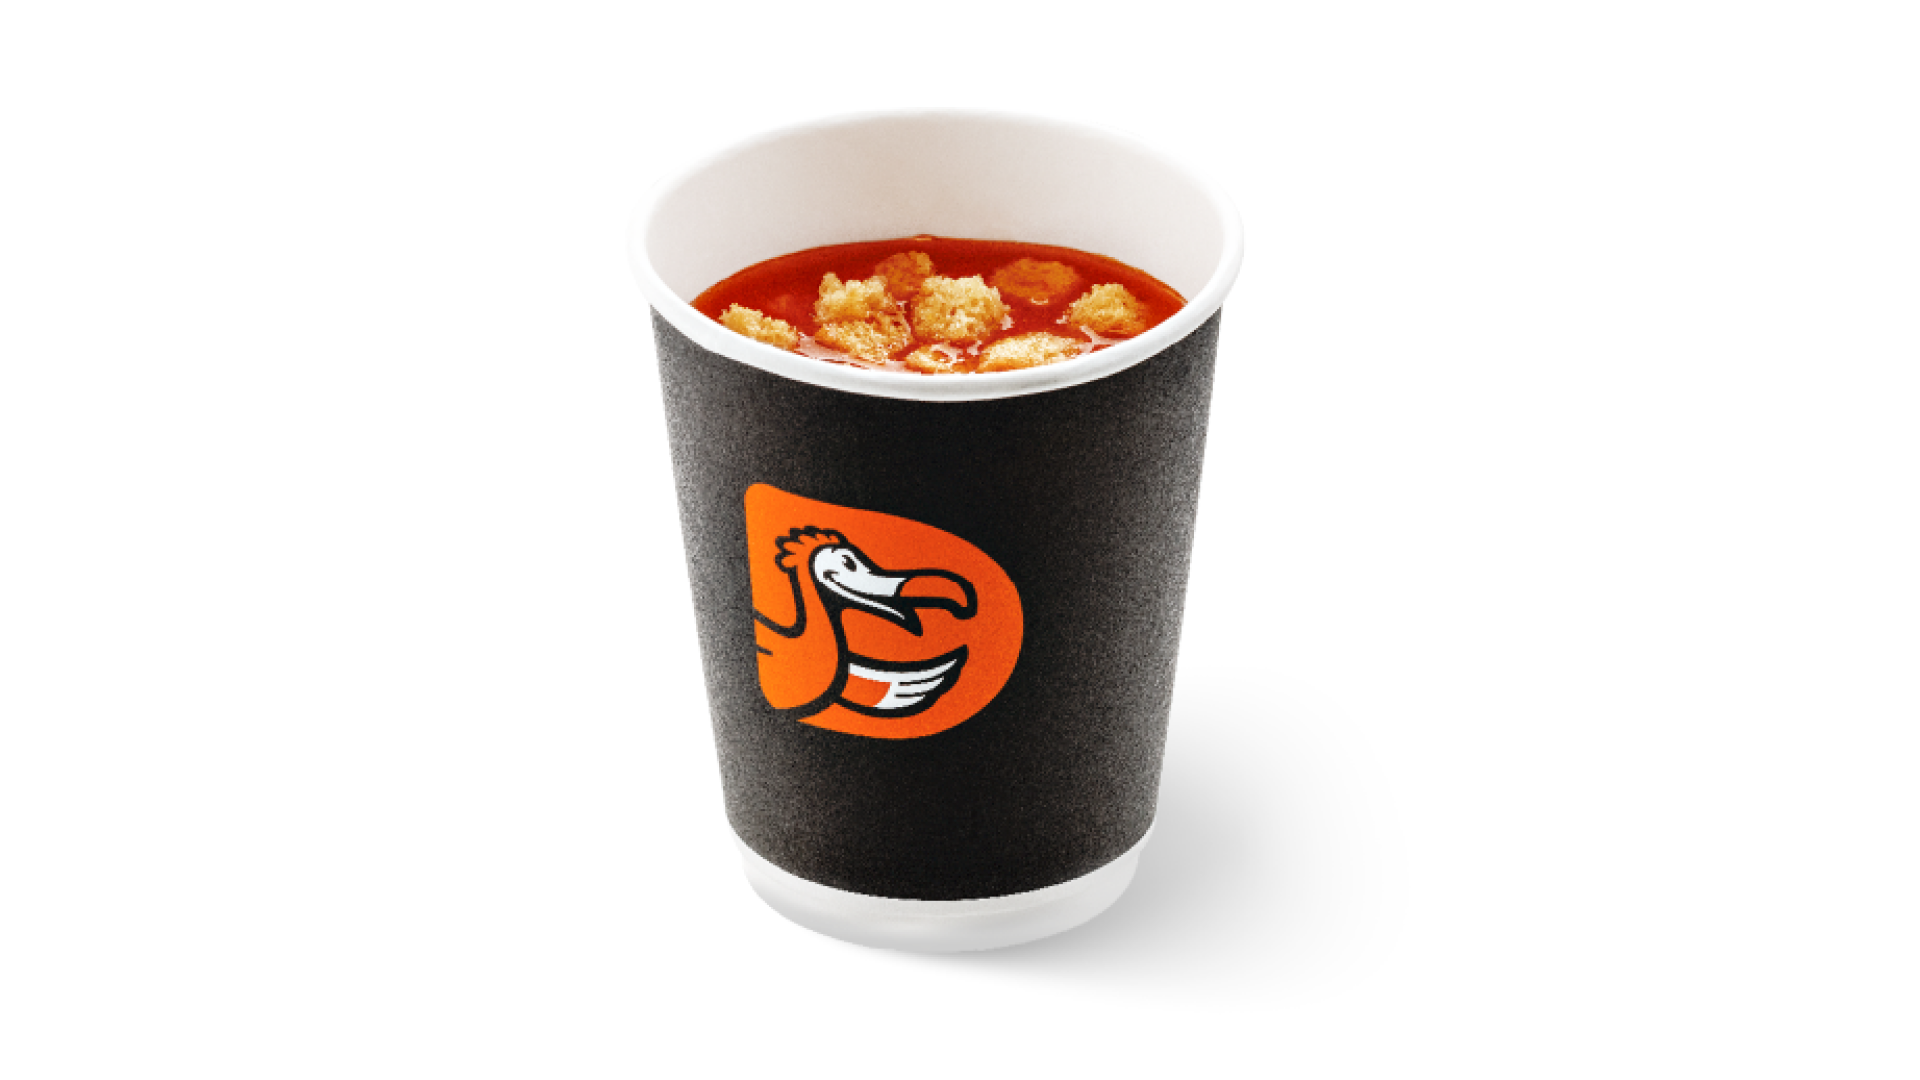
We shoot food for the website catalog on a white background. the light is directed straight at the object, so it creates almost no reflections – we can see a clean and homogeneous background as a result. Essentially, reflexes are unnecessary here.
If you insert such a “catalog” photo into a layout with a blue or purple background, it will be obvious that the object is placed into the layout too roughly, it does not appear integrated into the context. the food will look artificial. You don't want to eat such food.
How to draw reflexes
To draw reflexes, use the Soft Round brush and different blending modes in Photoshop. Here is step-by-step instruction on how to do this:
-
Open the file with the target image in Adobe Photoshop. Make a mask on the contour of the object to which you want to add reflexes.
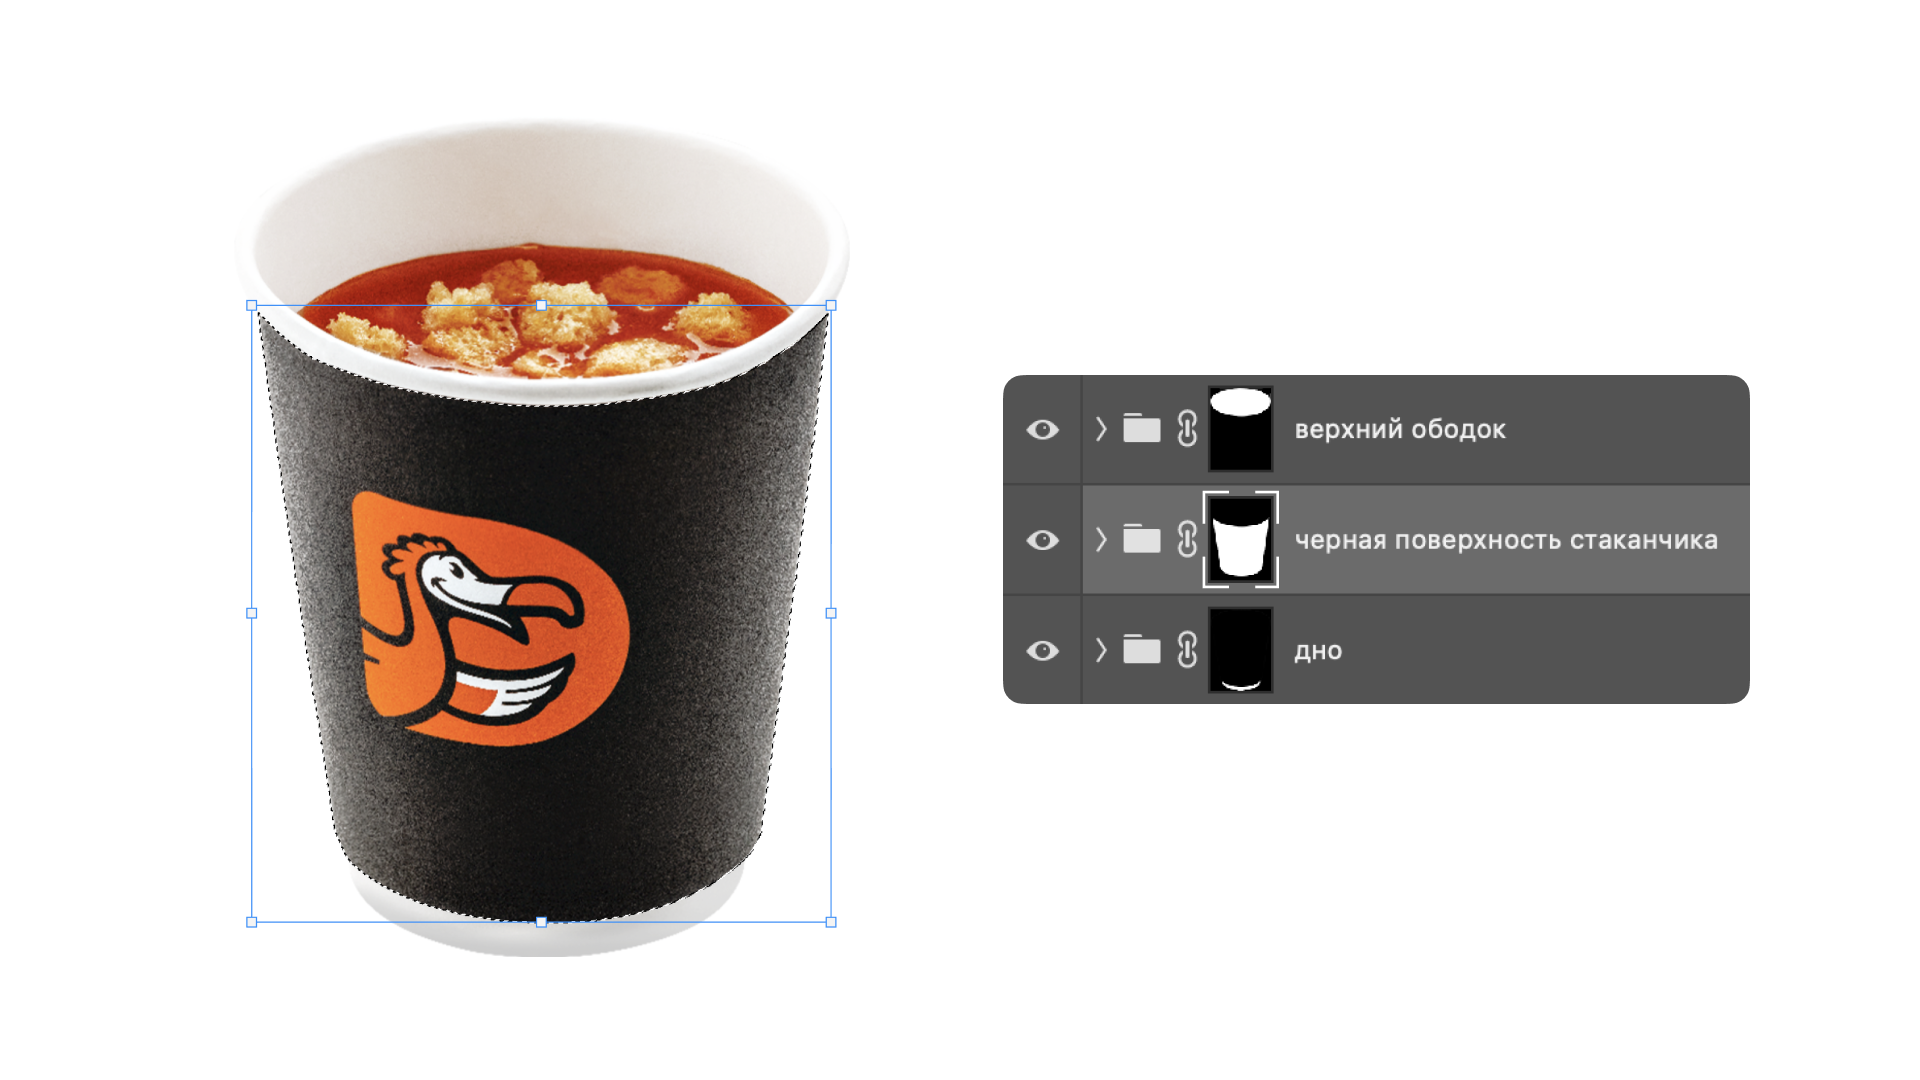
Select the black surface of the glass separately, the white part from the bottom and the white part from the top (bottom and top rim). -
Evaluate the colour of the background. Products placed on a bright background cannot have pure-white reflexes. the background always affects the colour of the products: all the reflexes should be of similar shades – top, bottom and sides. If the layout has a purple background, add coloured areas of purple shades to the image.
-
Select the Soft Round brush. Select the size of the brush according to the size of the object. the bigger the brush, the better: you get a softer edge and a smooth transition.
Draw on the cup with the edge of a large brush (Soft Round 500) – we get the required effect of reflection Small brush leaves too sharp and active lines -
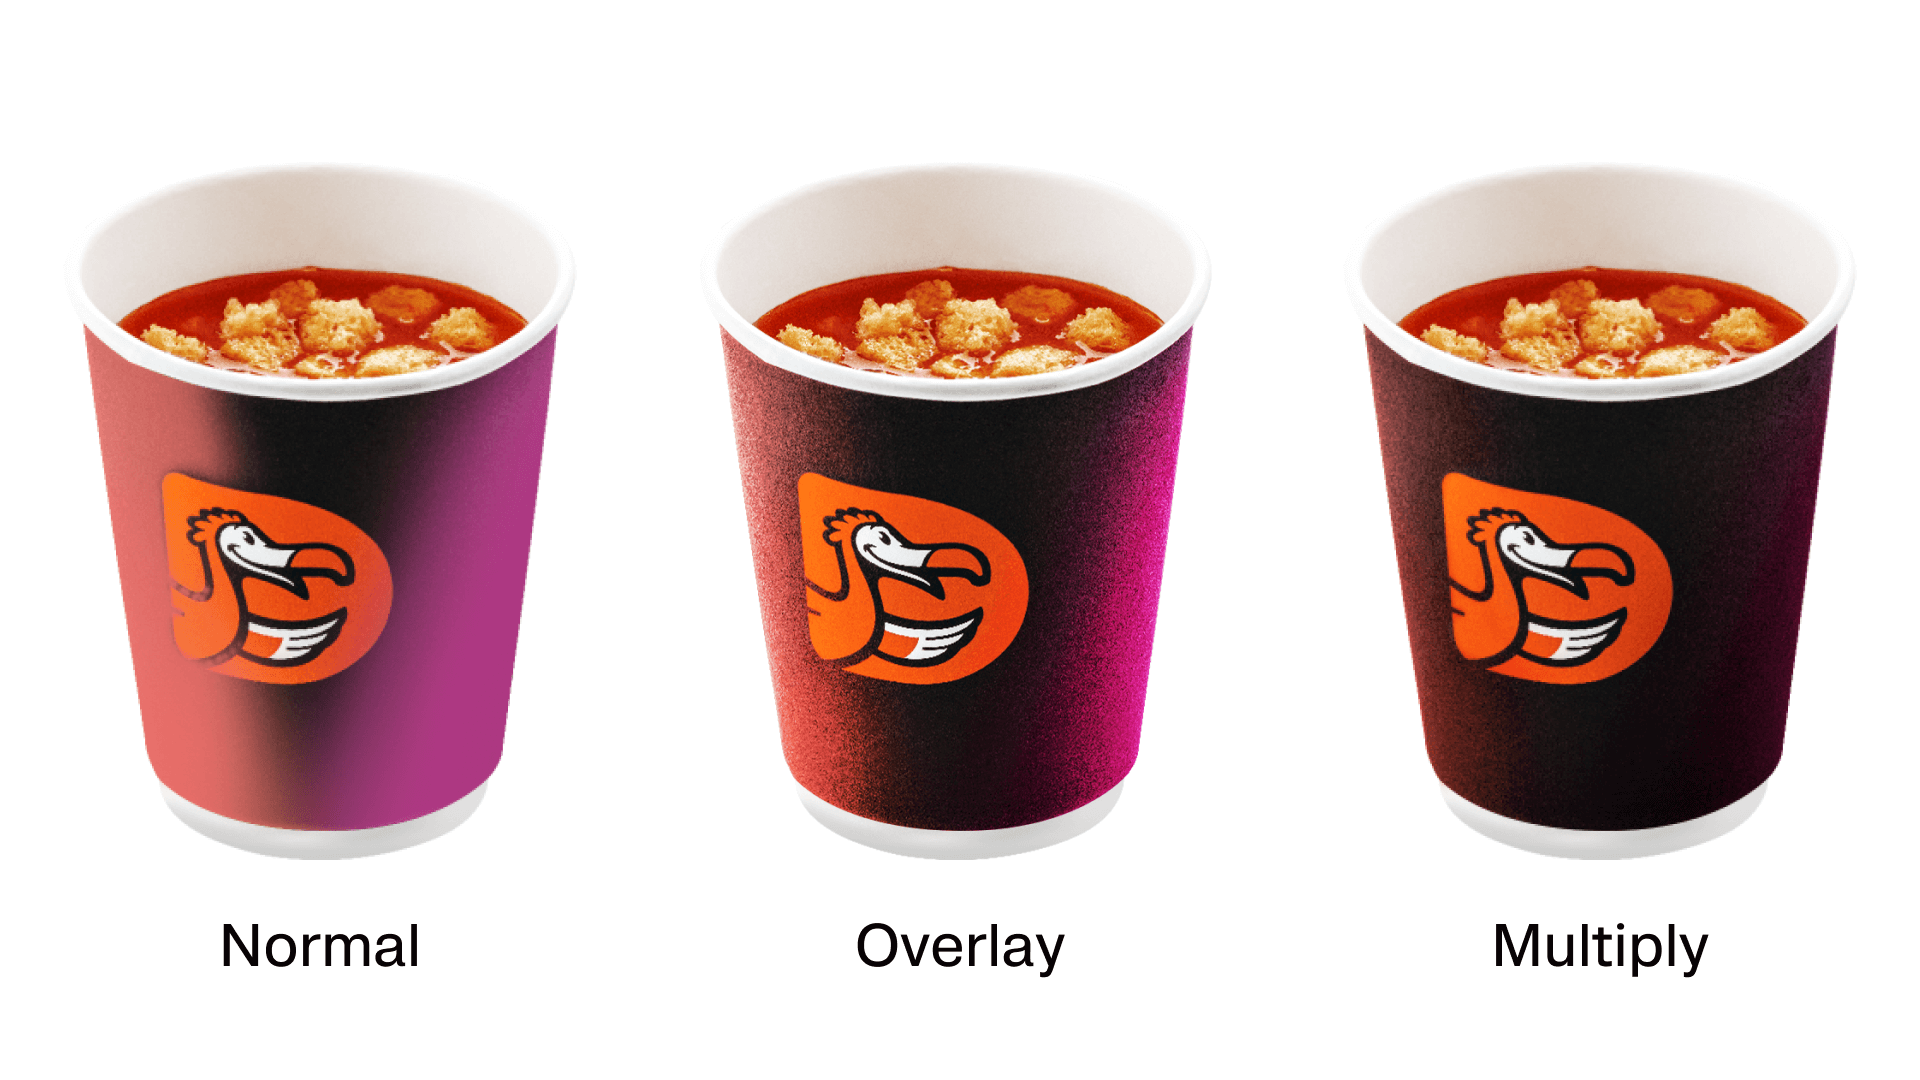
Add overlays. For this task we use Overlay, Multiply, Color Burn or Soft Light modes. There is no unified advice – we choose the most fitting option for each single layout and see which of the overlays is more suitable. If the reflex turns out to be too active in colour, fix it with the transparency of overlays.
Overlay and Soft Light work well on light surfaces, but sometimes you have to duplicate layers, because these overlays are not visible on pure white. If you duplicate Overlay several times, the tint will appear.
For black objects, use Multiply or Color Burn – they cover the white tints.
All lines are made exaggeratedly with one overlay to show the difference. Doing the job, we need to mind the task; most often we make different lines by different overlay -
Work out the realism. If the timing allows, draw details. If the customer hurries, we do "good enough": add reflexes on top, bottom and sides.
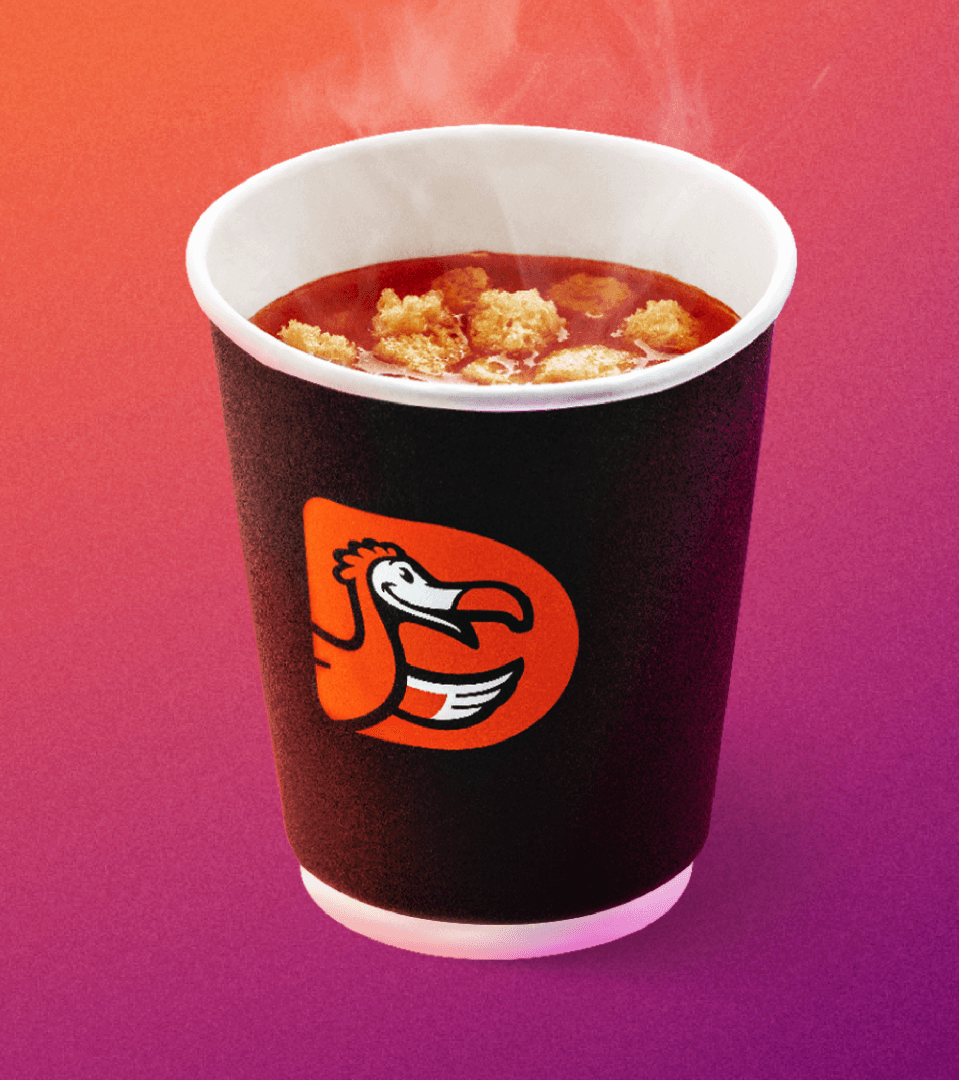
In the first example, the glass does not fit into the coloured background. In the second example, we took into account all the colours, added reflexes and some haze
Read next: