
Preparing pizzeria facade stickers for printing
To place a sticker on the facade, you need to identify the type and dimensions of the windows, prepare the layout for printing and submit it to the printing house along with the production requirements.
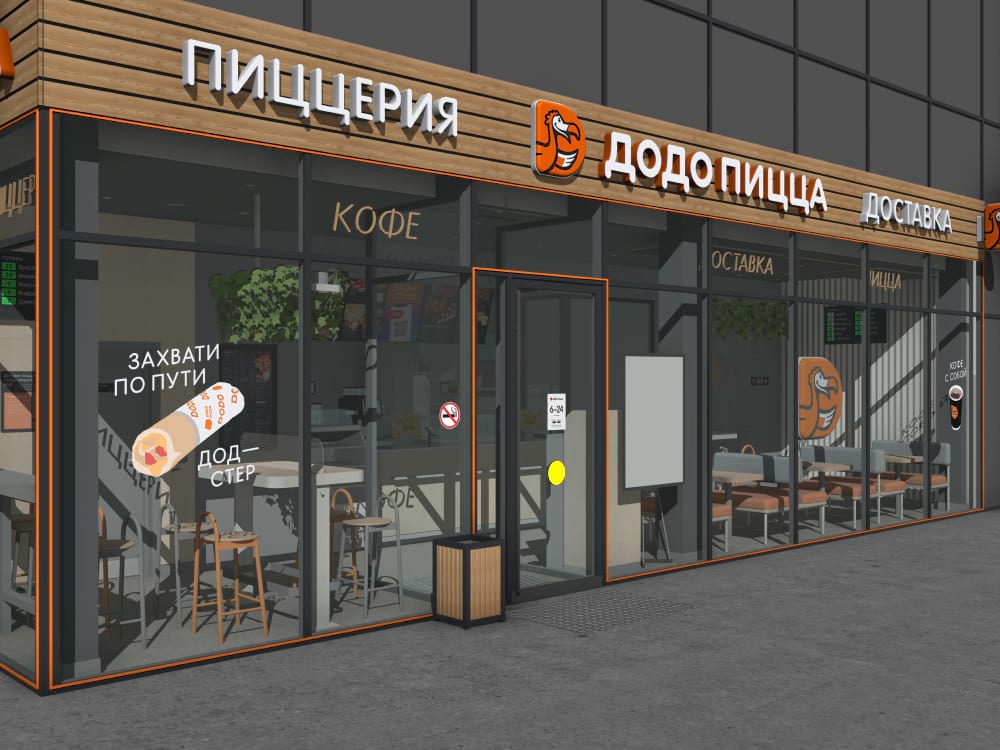
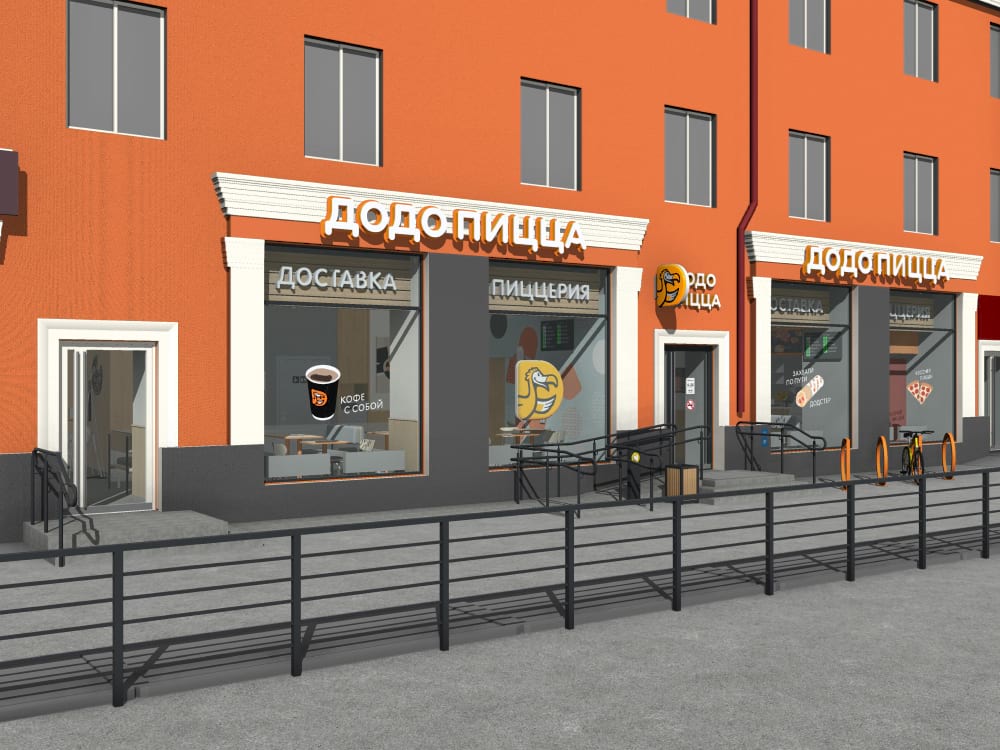
Identify the window type and size
We take into account facade features and local legislation restrictions for outdoor window advertising.
- Use price stickers, unless the city hall prohibits placing prices on windows.
- Place stickers only on the first (ground) floor, at the eye level, approximately 150-165 cm above the ground.
- For windows of an all-glass facade, place stickers in the center of the glazing panel, on every other one.
- For facades with separated windows we place stickers on each window, if the width of partitions between windows is greater than the width of window openings.
- On windows located on the same facade, the stickers must be of the same height. If windows are of different heights, align the stickers to the smallest one.
- Do not place stickers on top of the vertical separating elements (imposts) of the glazing.
Select the size of the sticker based on the size of the windows. The windows can be measured manually or you can find the dimensions in the pizzeria project.
- Optimal sticker size: 40% of the largest window measurement.
- Maximum sticker height: 1200 mm.
- Minimum sticker height: 400 mm.
- Distance to the right and left of the sticker: at least 18% of the window width.
Draw up the ToR for the printing house
The production process for all stickers is the same. Copy the text of the ToR and submit it to the printing house. When you receive the printed stickers, check the film for any possible defects and compare the image with the original layout.
Prepare a layout for printing
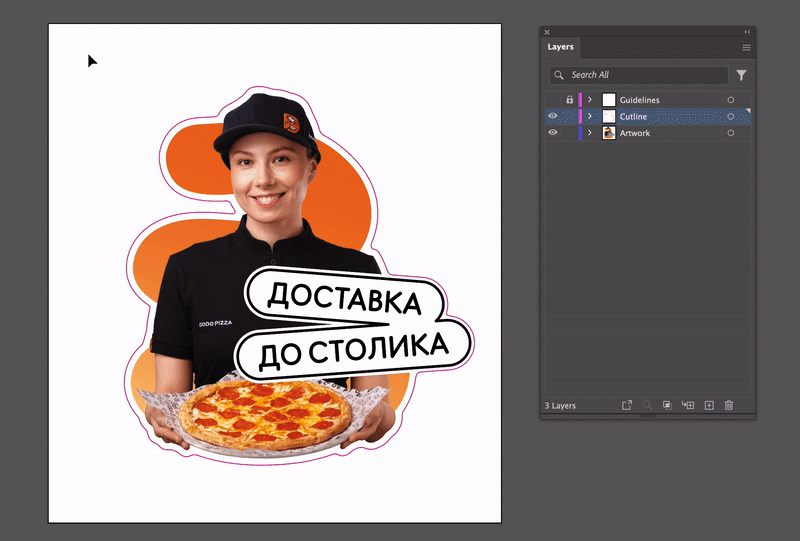
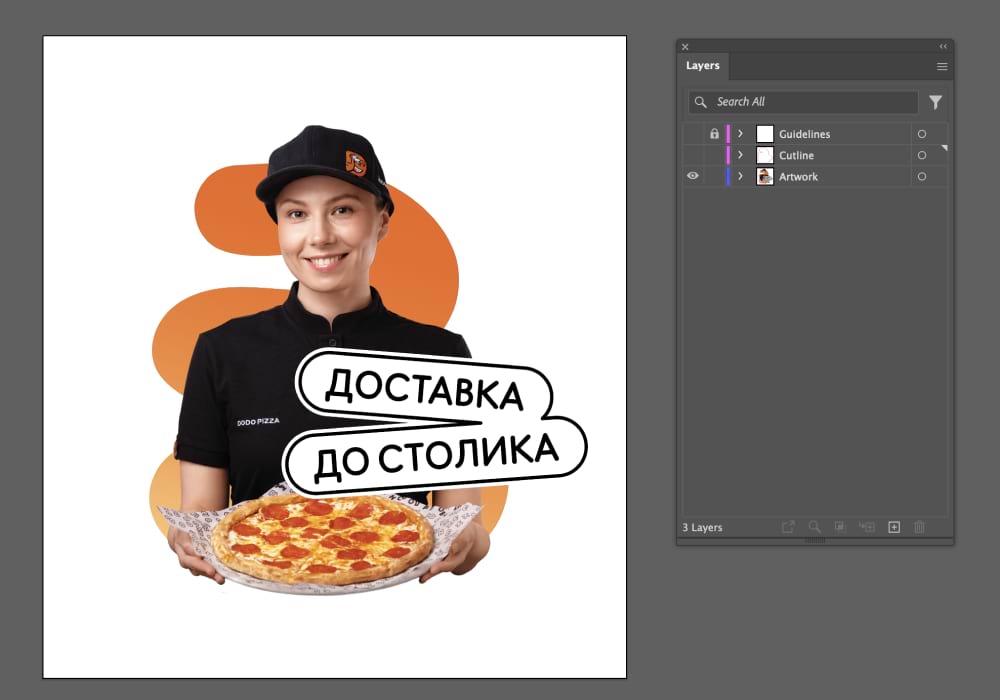
We prepare a layout for printing in Adobe Illustrator. The layout file contains basic layers that you can edit, as well as information layers with details about the materials you want to use to make the sticker.
To prepare the layout, watch the video or read the instructions.
The following instructions repeat all the steps described in the video, but in text format.
-
Figure out the dimensions of the windows. Measure them manually or find this information in the pizzeria project.
-
Create a 1-to-1 scale artboard equal to the size of your window. Add guides to define the area where the sticker will be placed.
The distance to the right and left of the sticker should be at least 18% of the window width. The optimal size of the sticker is up to 40% of the largest dimension of the window. The height of the sticker should not exceed 1200 mm.
-
Scale the image. Select the “Cutline” and “Artwork / Photo+Text” and “Artwork” layers. Copy and paste them into the layout. Scale the objects so that the sticker fits in the box you created with the guides. The sticker should not protrude the edges. Center the sticker horizontally and vertically.
Before scaling the sticker, pay attention to the quality of the bitmap image - it should not be less than 72 dpi.
Select objects, stretch the selected area -
Save “Cutline” and “Artwork” layers separately as PDF files. Select High Quality Print when saving.
To save the layers separately, turn them off one by one and export them twice. This way, there will be less chance for the production to make a mistake and accidentally print the cut outline around the layout. Make sure to mention this point when you send it to print.
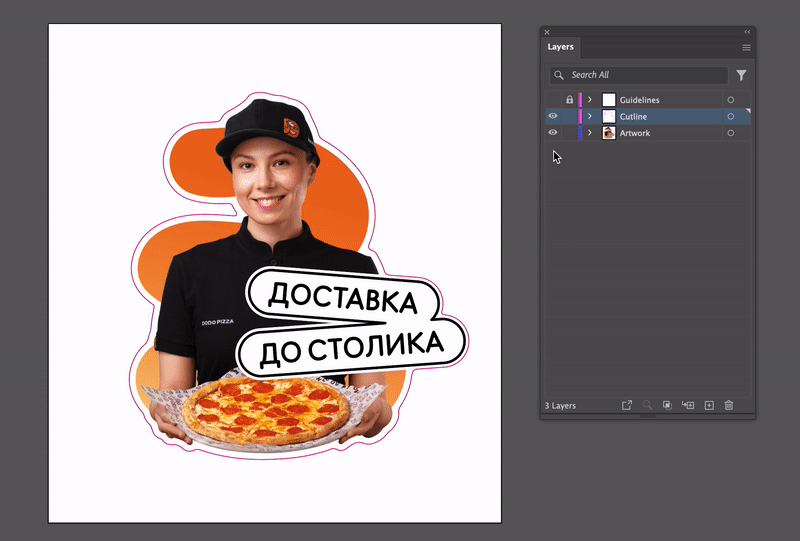
Turn off “Cutline” and “Artwork” layers one by one, and export each one -
Submit to printing. You should have two files for each sticker: one with the image from the “Artwork” layer and one with the cut lines from the “Cutline” layer. Send them to the printing house along with the ToR.
Print image (Artwork) 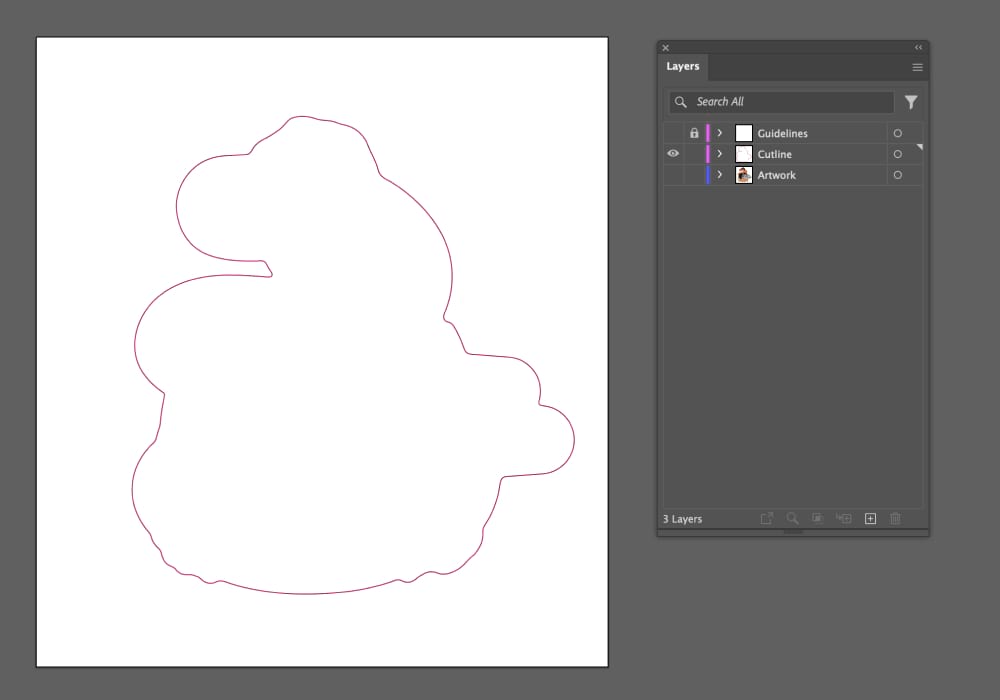
Cutline